10x Your Paying Customers With Web2.5: A Workshop Guide

Welcome to Web3SF! This workshop is going to be loaded with all the tools and tips you need to get started to expand your customer segment - using Web2.5. This guide is meant to serve as a reference during and after the workshop. All of the steps pertaining to the technical implementation will be covered here. If you're feeling like the workshop is a bit too fast-paced, don't fret. This guide covers all the same steps, in detail. Feel free to go at your own pace. You can always come back to this guide in the future as well 😊
Ok, let's get started!
Pre-requisite Setup
- Chrome browser
- MetaMask Wallet Extension
- Testnet MATIC. This is the fake money we will be using to execute our blockchain transactions. You can get some at this Mumbai Faucet.
- Some sort of IDE. I will be using VSCode during this workshop, but Replit is a good place to start if you're unfamiliar with IDEs.
To showcase the true power of Web2.5, we will be starting off with a very traditional Web3 project: an ERC 1155 drop. This is called an Edition Drop on thirdweb. You do not need create your own Edition Drop in this workshop. You can simply follow along as I set up the environment we can build off of.
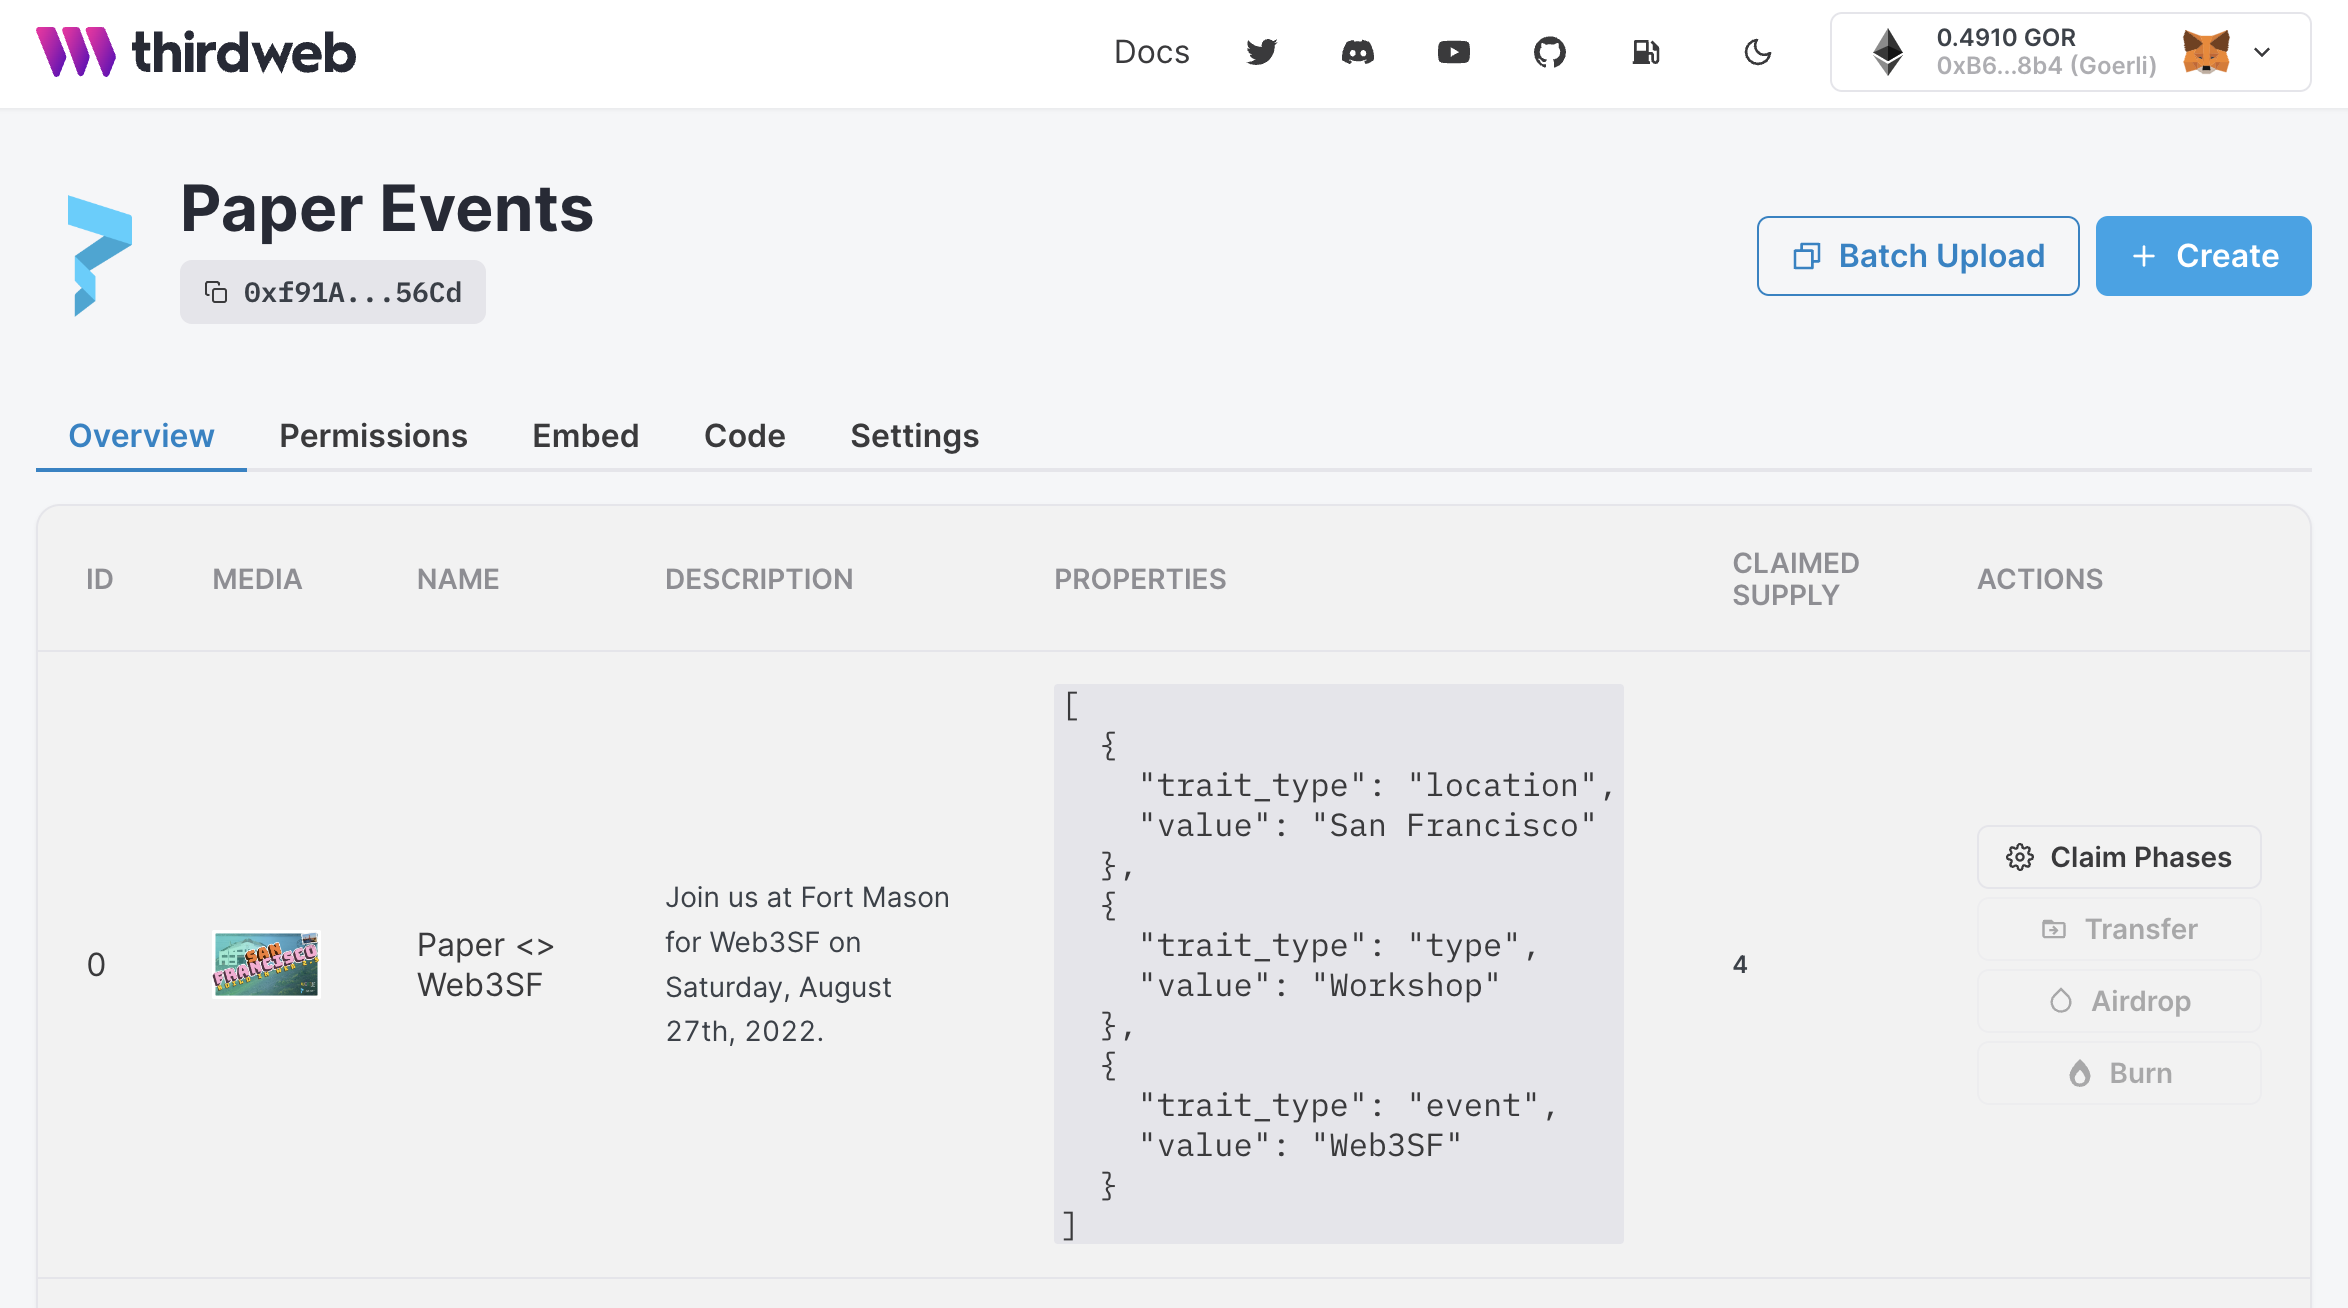
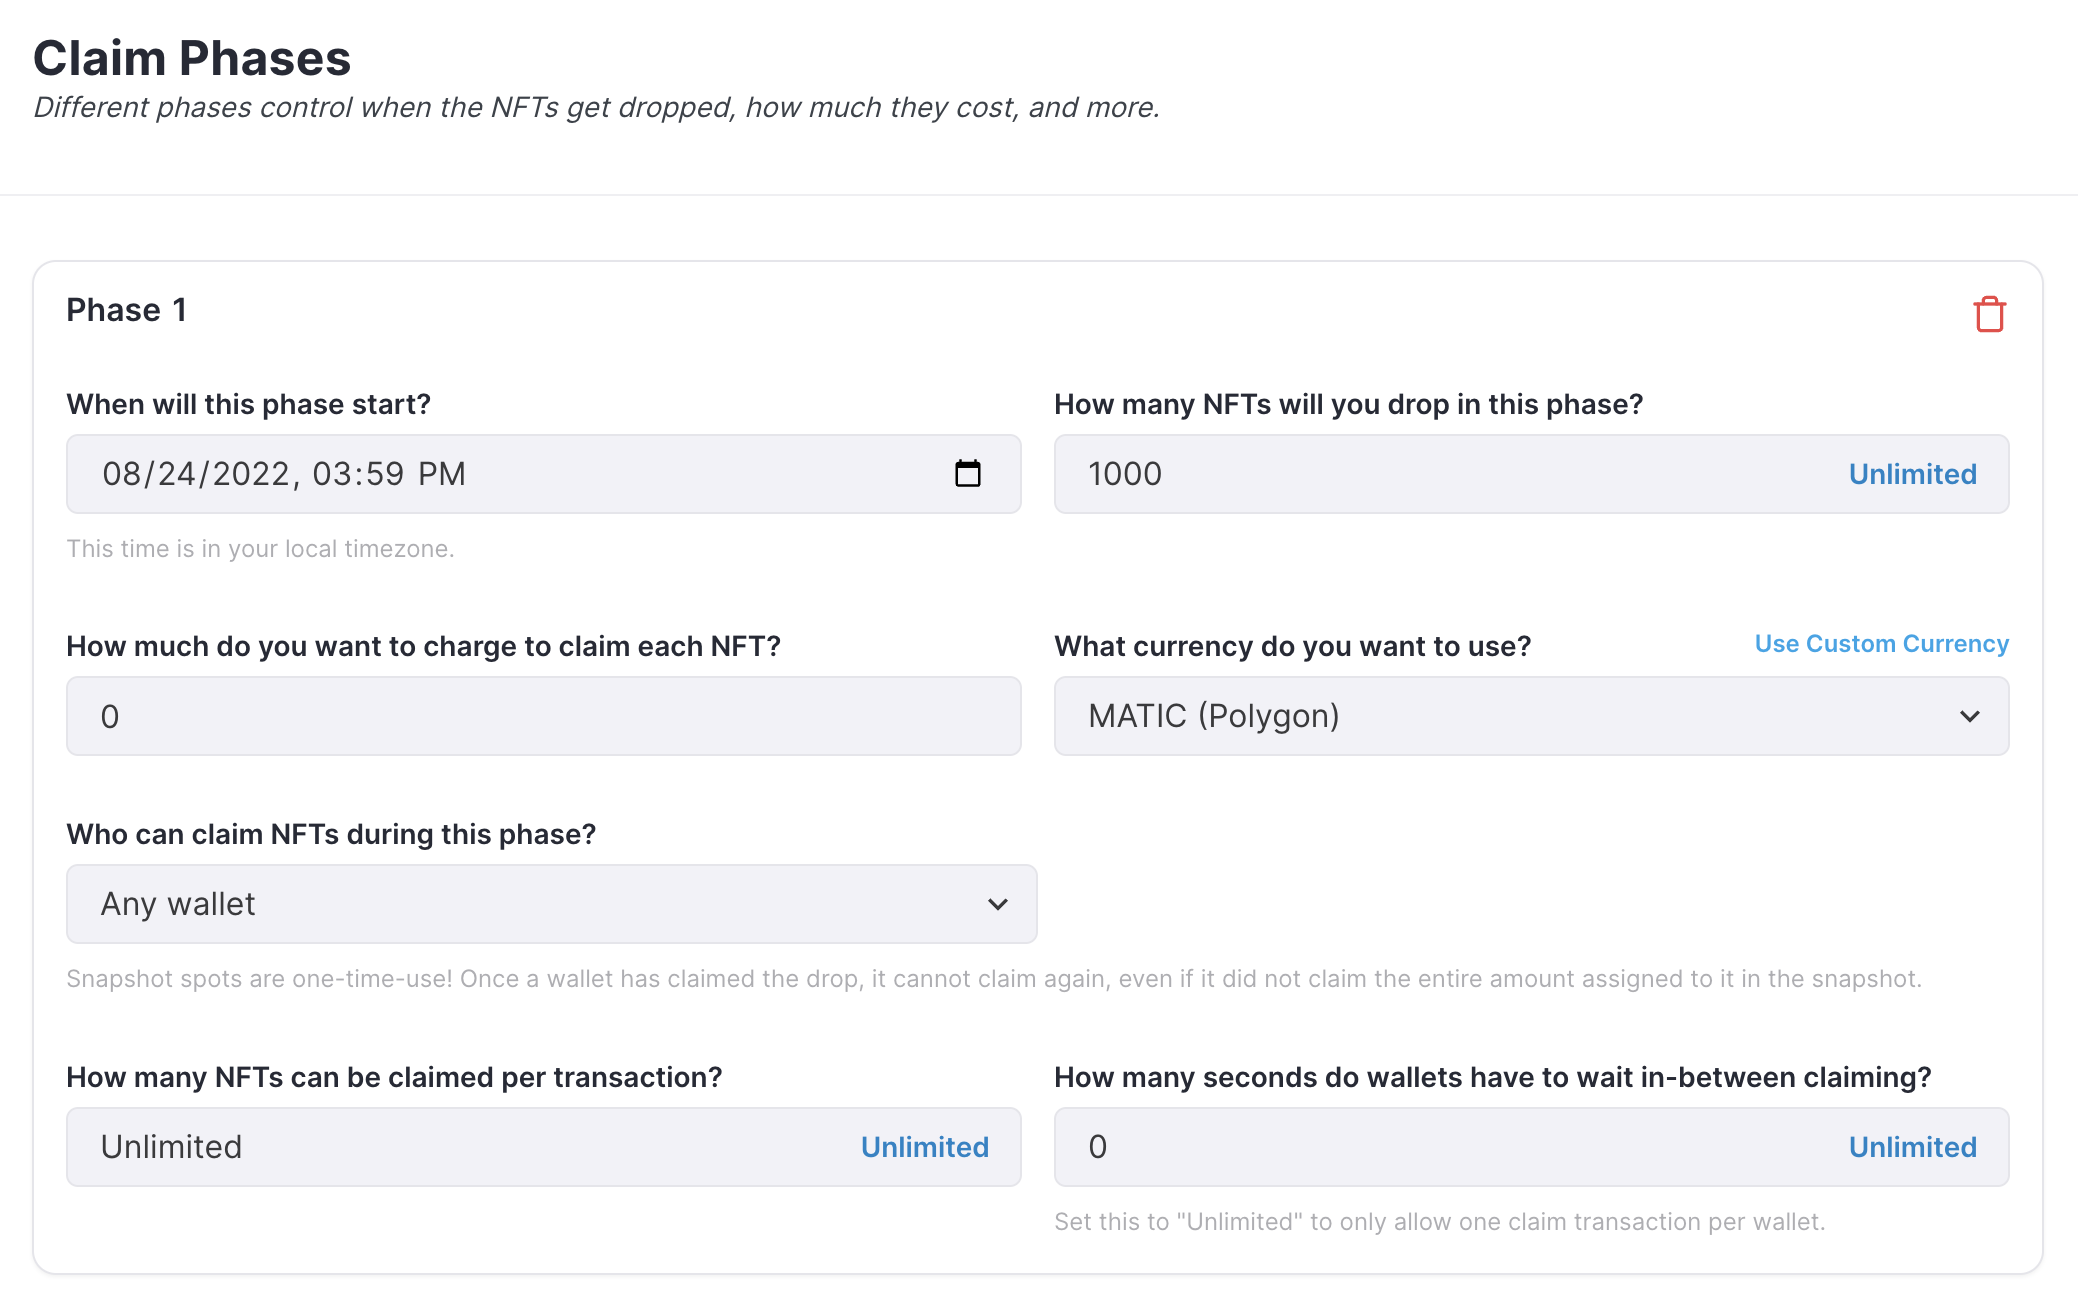
For reference, here's what my thirdweb dashboard looks like. I created an Edition Drop contract called "Paper Events" on Mumbai and uploaded a special Web3SF NFT with some metadata.
My smart contract address is 0xf91A07063BDA1458Cb5B327AbeDb31E2666A56Cd
Once you've completed the pre-requisite setup, we can get started!
Step 1: Clone the workshop repository
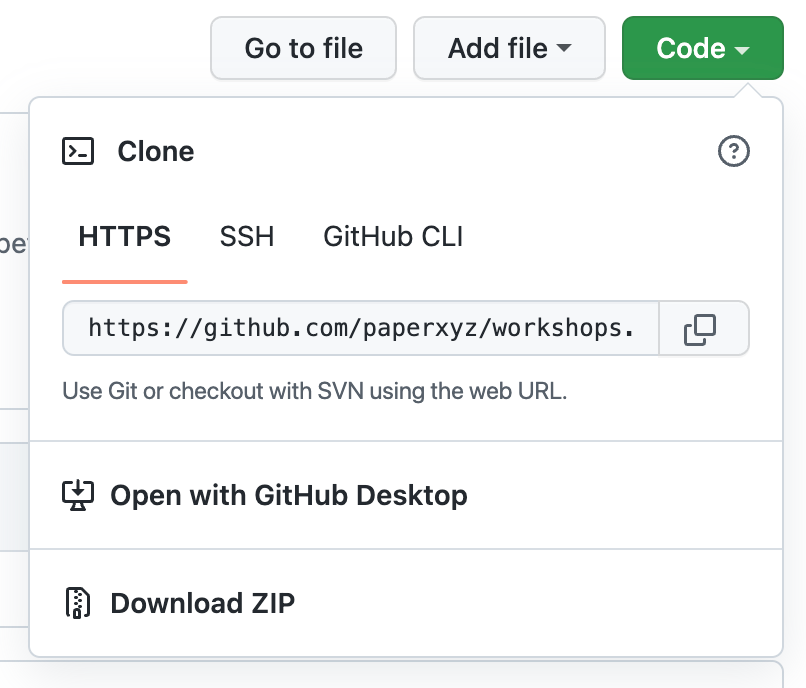
Head to the Paper Workshops Github repository and copy the URL under "HTTPS" when you click the "Code" button. This will allow us to clone a.k.a. make an identical copy of the repository. Head to your favorite IDE and import the Github repository using this URL.
Step 2: Switch to the web3sf-starter branch
There are 3 branches that are live on this repository. The main branch only has a ReadMe file, which explains each branch. The "web3sf-starter" branch is our starting environment. The "web3sf-solution" is an example of the end state we will get to by the end of the workshop. For now, go to your terminal and type:
git checkout web3sf-starterStep 3: Install all dependencies
Once you're on the "web3sf-starter" branch, use npm install to install all your repository dependencies at once.
npm installStep 4: Spin up localhost
The application we're creating is using the Next.JS framework. This means there is a fast refresh feature enabled by default. This is great because we can see our frontend update live as we're making changes to our codebase. On your terminal, type npm run dev and head to localhost:3000 on your browser.
npm run dev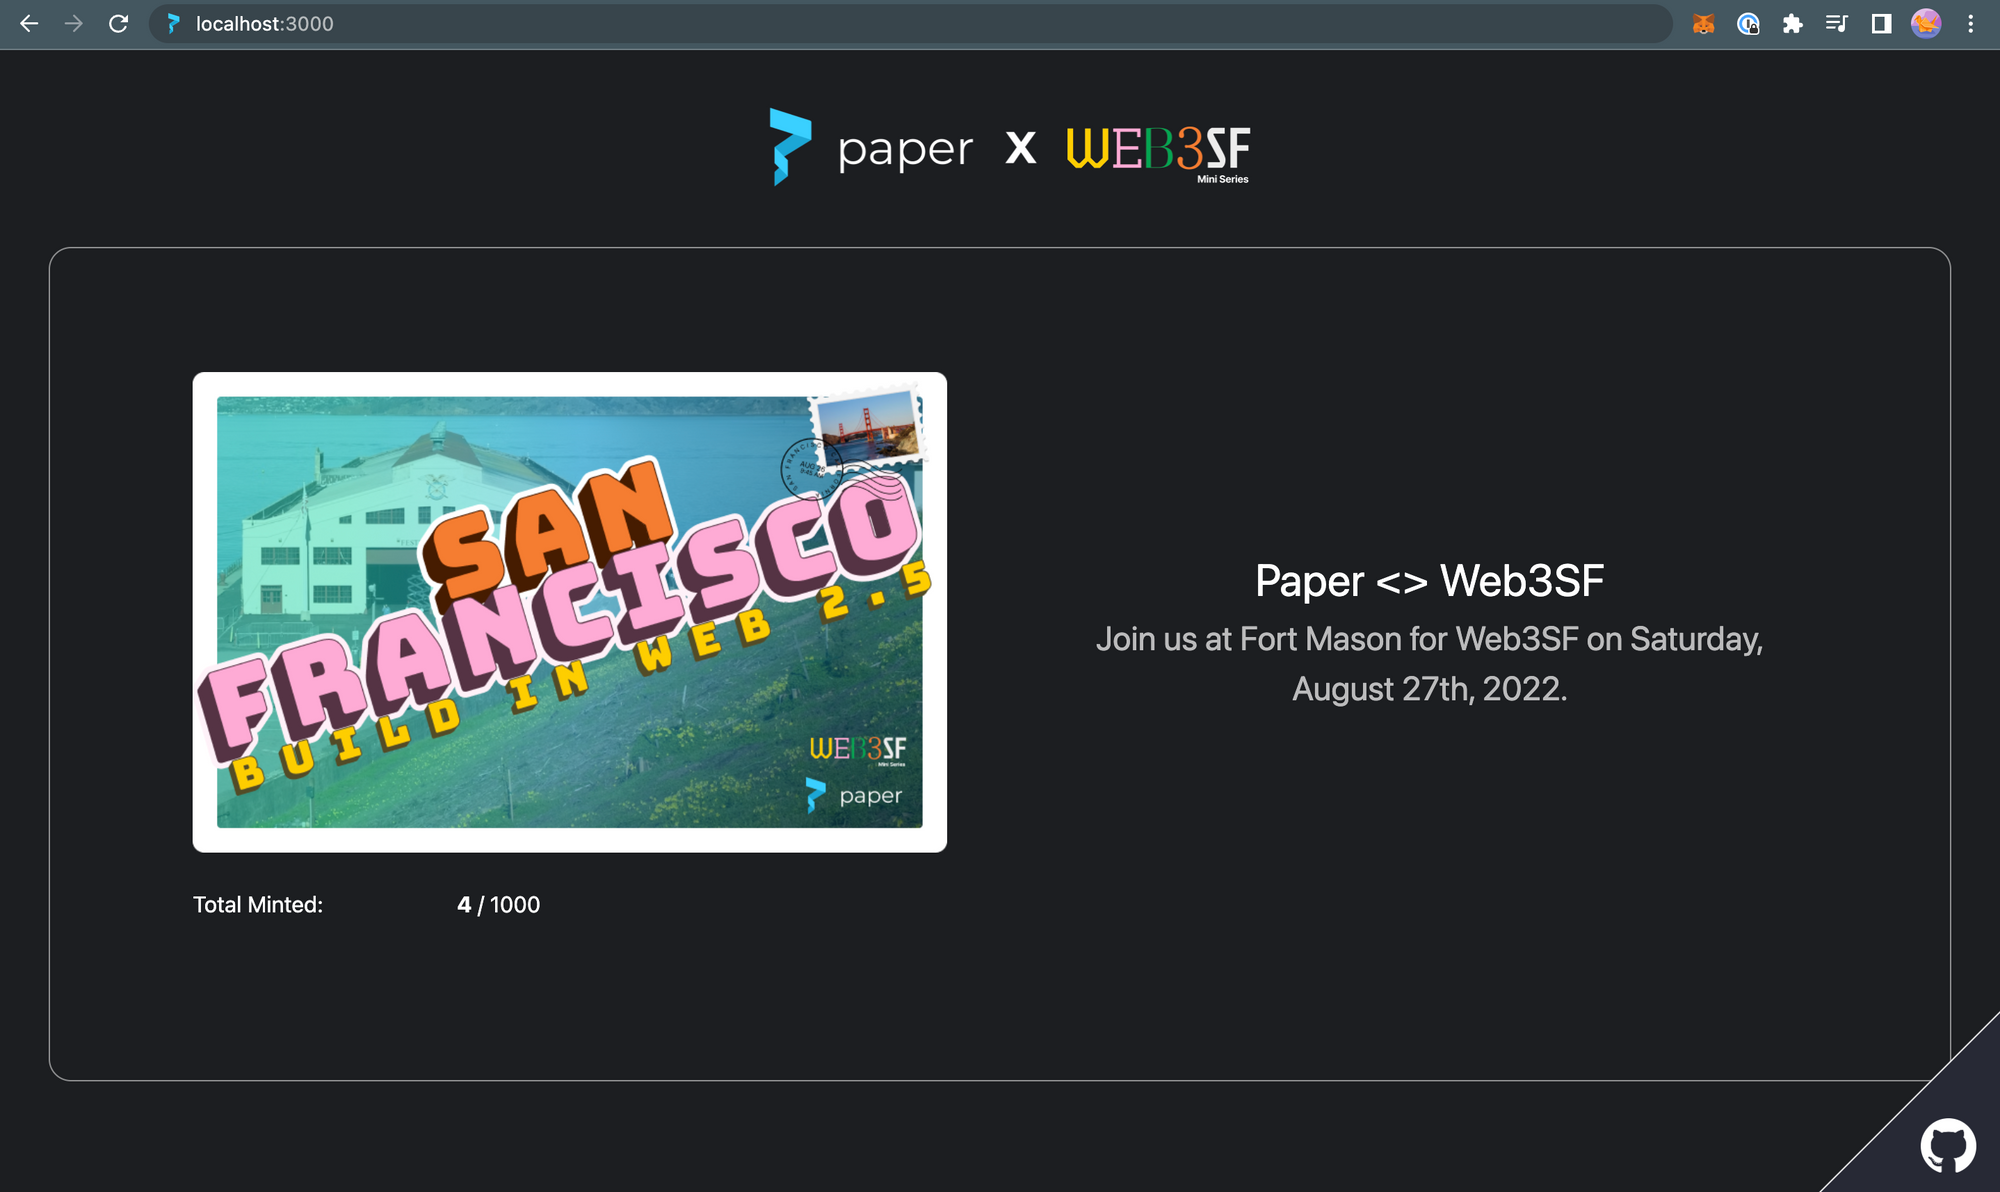
Step 5: Register the smart contract
Now that we've set up our starter environment, we can start working on using web2.5 tools to expand our customer base. One of the best tools to do this is using Paper. Let's head to the Paper Developer Dashboard contracts page.
Click on "Register Contract" and fill in the contract details. Here's what it should look like:
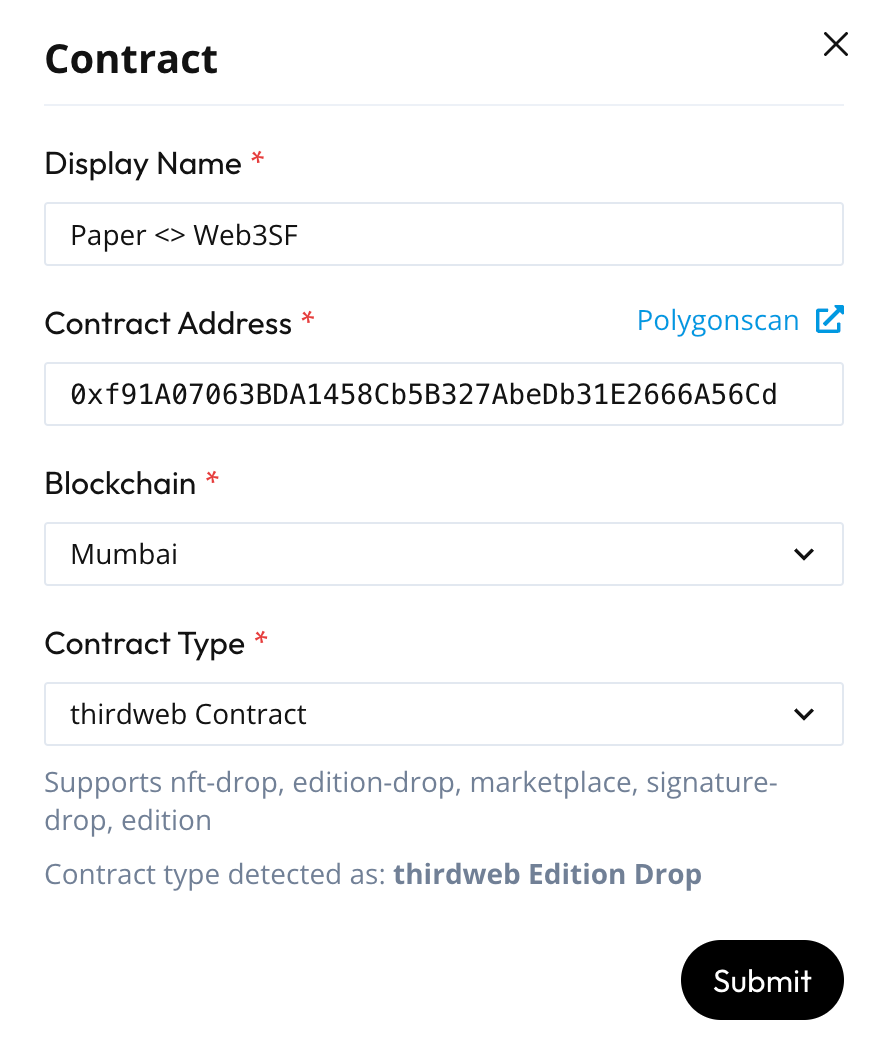
Make sure Paper has auto detected your smart contract type as "thirdweb Edition Drop". From here, make sure to copy over your "contract ID". Paste the "contract ID" we just copied over to line 20 of the index.tsx file.
Next, create a .env.local file in your root directory. Type in the following into this file:
PAPER_API_KEY=your-api-keyHead to the "developers" tab in the Paper Developer Dashboard. Copy your API key and replace the "your-api-key" text in the .env.local with the key you just copied over.
Step 6: Build out the Checkout Flow
The index.tsx file. This is the file that we're going to build in. The only other relevant files in the repository are the stylesheets under the styles/ directory which we do not need to touch for the purposes of this workshop. We also have an app.tsx file that just names our app. We also don't need to touch this. And lastly, we can a create-client-secret.ts file in the /api folder that we will discuss later in the workshop.
We'll be implementing 3 main React SDK components offered by Paper:
1. <CreateWallet>
2. <CheckoutWithCard>
3. <CheckoutWithEth>
Since our main goal in this workshop is to learn about tools that expand our customer segment, let's dive a bit deeper into what each of these components can do.
<CreateWallet> is a component that can generate non-custodial wallets on the fly that are tied to an email. For customers that don't have a wallet (or don't know about them), they can have a simple email login that allows them to view and use their NFTs on their own very Paper Wallet.
<CheckoutWithCard> is a component that processes a payment for an NFT via credit card. Using Web2 infrastructure like credit card allows you to bridge the gap between Web2 infrastructure and Web3 technologies by enabling payment via credit card.
<CheckoutWithEth> is a component that accepts cross-chain crypto payments for any of Paper's supported chains by taking payment in Eth from the buyer instead.
The flow we want our customers to go through is as follows:

We want our buyers to create a NFT-first non-custodial wallet on the fly, then choose a payment method of either paying with card or paying with Eth. Note that for the sake of the workshop length, we aren't implementing a native mint option here but I encourage you to build out a "Mint With MATIC" flow as your native mint payment method afterward! After the payment is successful, we want to show our customer a "payment complete" page.
Let's make an enum variable for all these page states and add this around line 22:
enum CheckoutPage {
  CREATE_WALLET = "CREATE_WALLET",
  CHOOSE_PAYMENT_METHOD = "CHOOSE_PAYMENT_METHOD",
  CHECKOUT_WITH_CARD = "CHECKOUT_WITH_CARD",
  CHECKOUT_WITH_ETH = "CHECKOUT_WITH_ETH",
  PAYMENT_COMPLETE = "PAYMENT_COMPLETE"
}
There's a few things we're going to need to store about our user: the page state that they're on, their wallet address to send the NFT to, and their email address to send the purchase receipt to. Let's add the following lines in the Home constant:
// Setting the user's page
const [currentPage, setCurrentPage] = useState(CheckoutPage.CREATE_WALLET);

// The user's wallet address
const [recipientWalletAddress, setRecipientWalletAddress] = useState("");

// The user's email address
const [email, setEmail] = useState('');
And lastly, we will need to switch our page depending on the buttons that the user clicks. The following code renders a new page every time the page state changes. Let's add this code below the NFT metadata description (around line 104).
{(() => {
  switch (currentPage) {
    case CheckoutPage.CREATE_WALLET:
      return <CreateWalletPage setRecipientWalletAddress=				  {setRecipientWalletAddress} setCurrentPage={setCurrentPage} 		  setEmail={setEmail} email={email}/>;
    case CheckoutPage.CHOOSE_PAYMENT_METHOD:
      return <ChoosePaymentMethodPage setCurrentPage=					  {setCurrentPage}/>;
    case CheckoutPage.CHECKOUT_WITH_CARD:
      return <CheckoutWithCardPage recipientWalletAddress=				  {recipientWalletAddress} setCurrentPage={setCurrentPage} email=	   {email}/>;
    case CheckoutPage.CHECKOUT_WITH_ETH:
      return <CheckoutWithEthPage recipientWalletAddress=				  {recipientWalletAddress}setCurrentPage={setCurrentPage} email=	  {email}/>;
    case CheckoutPage.PAYMENT_COMPLETE:
       return <PaymentCompletePage />;
  }
})()}
Step 7: Generate wallets on the fly
In this workshop, we will be using the <CreateWallet> component to generate wallets on the fly. Beyond this workshop, you can also add integrations with MetaMask, WalletConnect, and other wallets! The code below verifies the buyer's email and generates a Paper Wallet, which is a NFT-first non-custodial wallet. It also stores their email address, and wallet address for the rest of the purchase. Add the code below outside all the code blocks, at the very bottom of the index.tsx file:
// create wallet page
const CreateWalletPage = (props: {setRecipientWalletAddress: (walletAddress: string) => void, setCurrentPage: (page: CheckoutPage) => void, setEmail: (e: string) => void, email: string}) => {
  const setRecipientWalletAddress = props.setRecipientWalletAddress;
  const setCurrentPage = props.setCurrentPage;
  const setEmail = props.setEmail;
  const email = props.email;

  return (
    <div className={styles.emailContainer}>
      <p >Please enter your email below:</p>
      <label className={styles.customfield}>
        <input type="email" value={email} onChange={(e) => 					{setEmail(e.target.value)}}/>
        <span className={styles.placeholder}>Enter Email</span>
      </label>
      <CreateWallet
        emailAddress={email}
        onSuccess={(user: PaperUser) => {
          console.log('CreateWallet callback', user);
          console.log(email);
          setRecipientWalletAddress(user.walletAddress);
          setCurrentPage(CheckoutPage.CHOOSE_PAYMENT_METHOD)
        }}>
        <button className={styles.mainButton}>
          Verify Email
        </button>
      </CreateWallet>
    </div>
  )
}
Step 8: Give your customers options
Here we are giving our customers options to choose between paying with card and paying with cross-chain cryptocurrency, in this case Eth. This page changes the checkout flow based on which button the user click. Add the code at the bottom of the index.tsx file:
// choose payment page
const ChoosePaymentMethodPage = (props: {setCurrentPage: (page: CheckoutPage) => void}) => {
  const setCurrentPage = props.setCurrentPage

  return (
    <div>
      <button className={styles.mainButton} onClick={() => setCurrentPage(CheckoutPage.CHECKOUT_WITH_CARD)}>Pay With Card</button>
      <button className={styles.mainButton} onClick={() => setCurrentPage(CheckoutPage.CHECKOUT_WITH_ETH)}>Pay With ETH</button>
    </div>
  )
}
Step 9: Create a client-secret
For our customers to checkout using a credit card or cross-chain cryptocurrency, Paper needs to generate a client-secret. This ensures that every checkout session is unique and cannot be spoofed. This is especially useful if you ever want to implement any advanced features like allowlists. The API sits in the api/ directory of this repository. Add the client-secret API call to the bottom of the index.tsx file:
const fetchClientSecret = async (
  contractID: string,
  recipientWalletAddress: string,
  email: string
) => {
  try {
    const clientSecretResp = await fetch("/api/create-client-secret", {
      method: "POST",
      headers: {
        "Content-Type": "application/json",
      },
      body: JSON.stringify({ contractID, recipientWalletAddress, email }),
    });
    return (await clientSecretResp.json()).clientSecret;
  } catch (e) {
    console.log("error fetching the client secret", e);
  }
};
This code block is a simple render of the <CheckoutWithCard> component but with some styling to make the theme fit our app styling. Add this code to the bottom of the index.tsx file:
// pay with card page
const CheckoutWithCardPage = (props: {recipientWalletAddress: string, setCurrentPage: (page: CheckoutPage) => void, email: string}) => {
  const recipientWalletAddress = props.recipientWalletAddress;
  const setCurrentPage = props.setCurrentPage
  const email = props.email
  const [clientSecret, setClientSecret] = useState('');

  useEffect(() => {
    fetchClientSecret(contractID, recipientWalletAddress, email).then(
      (clientSecret) => {
        setClientSecret(clientSecret);
      }
    );
  }, [email, recipientWalletAddress]);

  return (
    <div>
      <CheckoutWithCard
        sdkClientSecret={clientSecret}
        options={{
          colorBackground: 'transparent',
          colorPrimary: '#19A8D6',
          colorText: '#fff',
          borderRadius: 6,
      }}
        onPaymentSuccess={(result: { id: string; }) => {
          console.log('PayWithCard callback', result);
          setCurrentPage(CheckoutPage.PAYMENT_COMPLETE)
        }}
      />
    </div>
  )
}
This code block is a simple render of the <CheckoutWithEth> component but with some styling to make the theme fit our app styling. Add this code to the bottom of the index.tsx file:
// pay with crypto page
const CheckoutWithEthPage = (props: {recipientWalletAddress: string, setCurrentPage: (page: CheckoutPage) => void, email:string}) => {
  const recipientWalletAddress = props.recipientWalletAddress;
  const setCurrentPage = props.setCurrentPage
  const email = props.email
  const [clientSecret, setClientSecret] = useState("");

  useEffect(() => {
    fetchClientSecret(contractID, recipientWalletAddress, email).then(
      (clientSecret) => {
        setClientSecret(clientSecret);
      }
    );
  }, [email, recipientWalletAddress]);

  return (
    <div>
      <CheckoutWithEth
        sdkClientSecret={clientSecret}
        options={{
          colorBackground: 'transparent',
          colorPrimary: '#fff',
          colorText: '#fff',
          borderRadius: 6,
      }}
        onSuccess={(args: {transactionId: string} ) => {
          console.log('PayWithCrypto callback', args);
          setCurrentPage(CheckoutPage.PAYMENT_COMPLETE)
        }}
      />
    </div>
  )
}
Step 10: Add a success page!
The last step we need is adding a page to direct our customers to their NFT wallet and thank them for purchasing. Feel free to customize this page however you like! Add this code to the bottom:
// payment complete page
const PaymentCompletePage = () => {
  return (
    <div>
      <p className={styles.spacerBottom}>
        Thanks for claiming the Paper x Web3SF NFT! Hope you enjoyed 		 our workshop and learned how to 10x your paying customers with 		Web2.5. Click the button below to view your Paper Wallet and 		 view your NFT.
      </p>
      <button className={styles.mainButton}>
        <a href="https://paper.xyz/wallet" target="_blank" 					rel="noreferrer">
          Paper Wallet
        </a>
      </button>
    </div>
  )
}
Next Steps:
Congrats on creating a fully functioning checkout flow with all the basic elements of Web2.5, like accepting credit card payments and cross-chain crypto payments. Take a look at the web3sf-solution branch if you got stuck at any point. I encourage you to take this project beyond the workshop. Here's some things you can do as well as some teasers for upcoming features (👀):
- Native Minting
- Connecting with other wallets like MetaMask
<VerifyOwnershipWithPaper>- Allowlists
- Sponsored Fees
- Apple Pay, Google Pay, Buy Now Pay Later SDK Checkout Elements
Thanks for attending our workshop at Web3SF. We hope to put out more educational content so onboard more people into the Web3 space. Come check out our upcoming events at the Science of Blockchain!

