Design the Best NFT Checkout: A Guide (pt. 1 Payment Options)
Learn how to choose the best payment options to offer your buyers from credit card, Google Pay, Apple Pay, iDEAL, cross-chain, and native mint
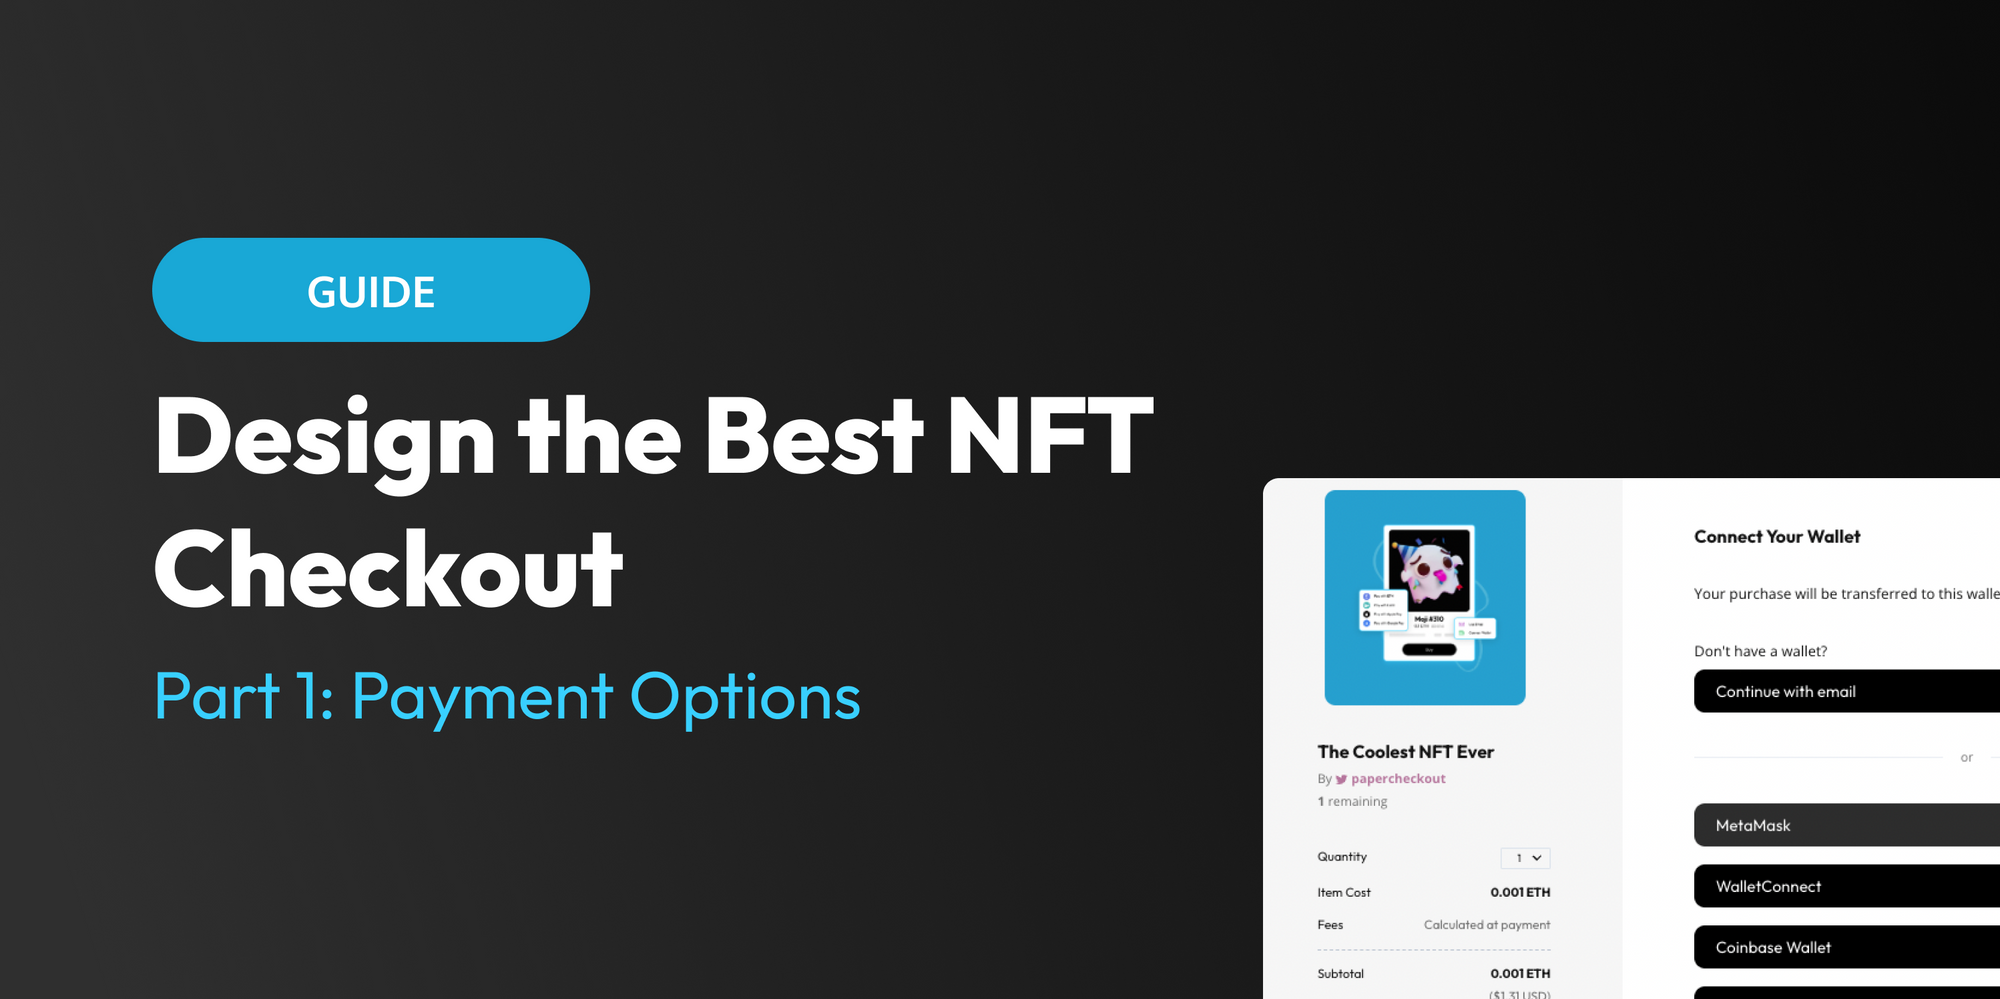
So, you want to learn how to create the best NFT checkout experience for your buyers? You've come to the right place– in this 2 part series, we'll dive into how you can offer a great checkout experience that can help you boost your conversion rates.
This article is part 1 of the series where we'll be discussing different payment options and how to get them set up using Paper! In part 2, we'll discuss all of the elements that make up an effective end-to-end checkout flow.
Why care about what payment options you provide your buyers with?
Everyone talks about onboarding the next billion users into web3, however, this isn't something that can be done solely through educational content or guides. At Paper, we believe that widespread adoption of NFTs and web3 will come from the intersection of web2 and web3. What we mean by this is leveraging web3 technology while offering familiar experiences like that of web2. We believe this is what eases the barrier to entry so anyone can participate and be curious about web3. In the payments realm, this looks like offering familiar payment methods such as credit cards to create an e-commerce-like experience while still leveraging blockchain technology to facilitate the transaction.
Options for every customer
At Paper, we provide multiple ways for you to reach your audience regardless of their crypto knowledge. We currently support the following payment methods with more to come:
- Credit card
- Google Pay
- Apple Pay
- iDEAL Payments
- Pay with ETH (Cross-chain)
- Native mint
If you want to skip ahead and read up on how to implement any of the payment options listed above, scroll down to see how you can get started.
Choosing the right payment options for your customers
There is no perfect answer as to what payment options you should provide, however, there are some questions you can ask yourself to understand which options might be best for your use case.
How crypto-savvy is my target audience?
This ties in with understanding who you're selling to. If you are a web2 brand that has typically catered to non-crypto native audiences you will likely want to provide payment options that are already familiar to your potential buyers. Non-crypto native individuals are already familiar with traditional e-commerce payment methods such as credit card, Google Pay, or Apple Pay. If you are confident that your buyers are comfortable with crypto, you may opt to offer strictly native minting (purchasing the NFT using the contract's native cryptocurrency) or perhaps the ability to purchase using other types of cryptocurrency such as ETH. Providing options that cater to different levels of crypto understanding is always a safe bet.
How many payment options should I provide?
You can provide as many payment options as you'd like. Even though you can enable all of the different payment methods listed above using Paper, that doesn't necessarily mean you have to. Sometimes, selecting just a few options creates a streamlined user experience and can even lead to a faster checkout conversion. Again, it is in your best interest to understand the wants and needs of your audience so you can choose the best payment options for them.
What implications come with different payment methods?
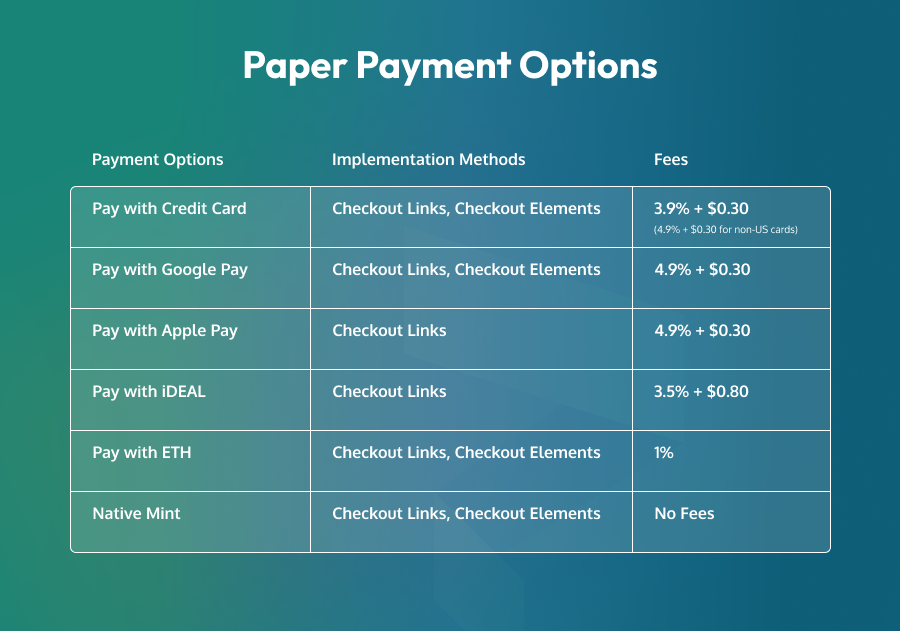
Different payment methods can come with different implications such as service fees for your buyers. The transaction fees for each payment option are listed below. The values reflect the total fees, including the payment provider's respective fees and Paper's fees.
Pay with Card: 3.9% + $0.30 for US cards / 4.9% + $0.30 for non-US cards
Pay with Google Pay: 4.9% + $0.30
Pay with Apple Pay: 4.9% + $0.30
Pay with ETH: 1%
iDEAL: 3.5% + $0.80
Native mint: No Paper fees
At Paper we have no hidden spreads– the price your buyer sees during checkout also expands to show a breakdown of where the fees come from.
Now that you've taken some time to answer these questions, let's learn how to implement each different payment option! For each payment option, you will be able to enable them within your checkout using our Checkout Links, Checkout Elements, or both. Our Checkout Links are our out-of-box checkouts that you can use with little to no code. Our Checkout Elements are our SDK components that you can use within your dApp to fully white-label your checkout experience.
1️⃣ Credit Card
Credit cards are our bread-and-butter payment option. Paper allows your customers to purchase NFTs using their credit card. With our payments processing powered by Stripe and Checkout.com, we support the following cards:

How to get credit card payments set up:
There are two ways you can set up credit card payments for your NFT checkout: by using our Checkout Links or by using our <PayWithCard> Checkout Element.
Implementation with Checkout Links:
- Register your contract in the 'Contracts' section of your Paper Dashboard
- Create a shareable checkout link by clicking 'Create Shareable Link'
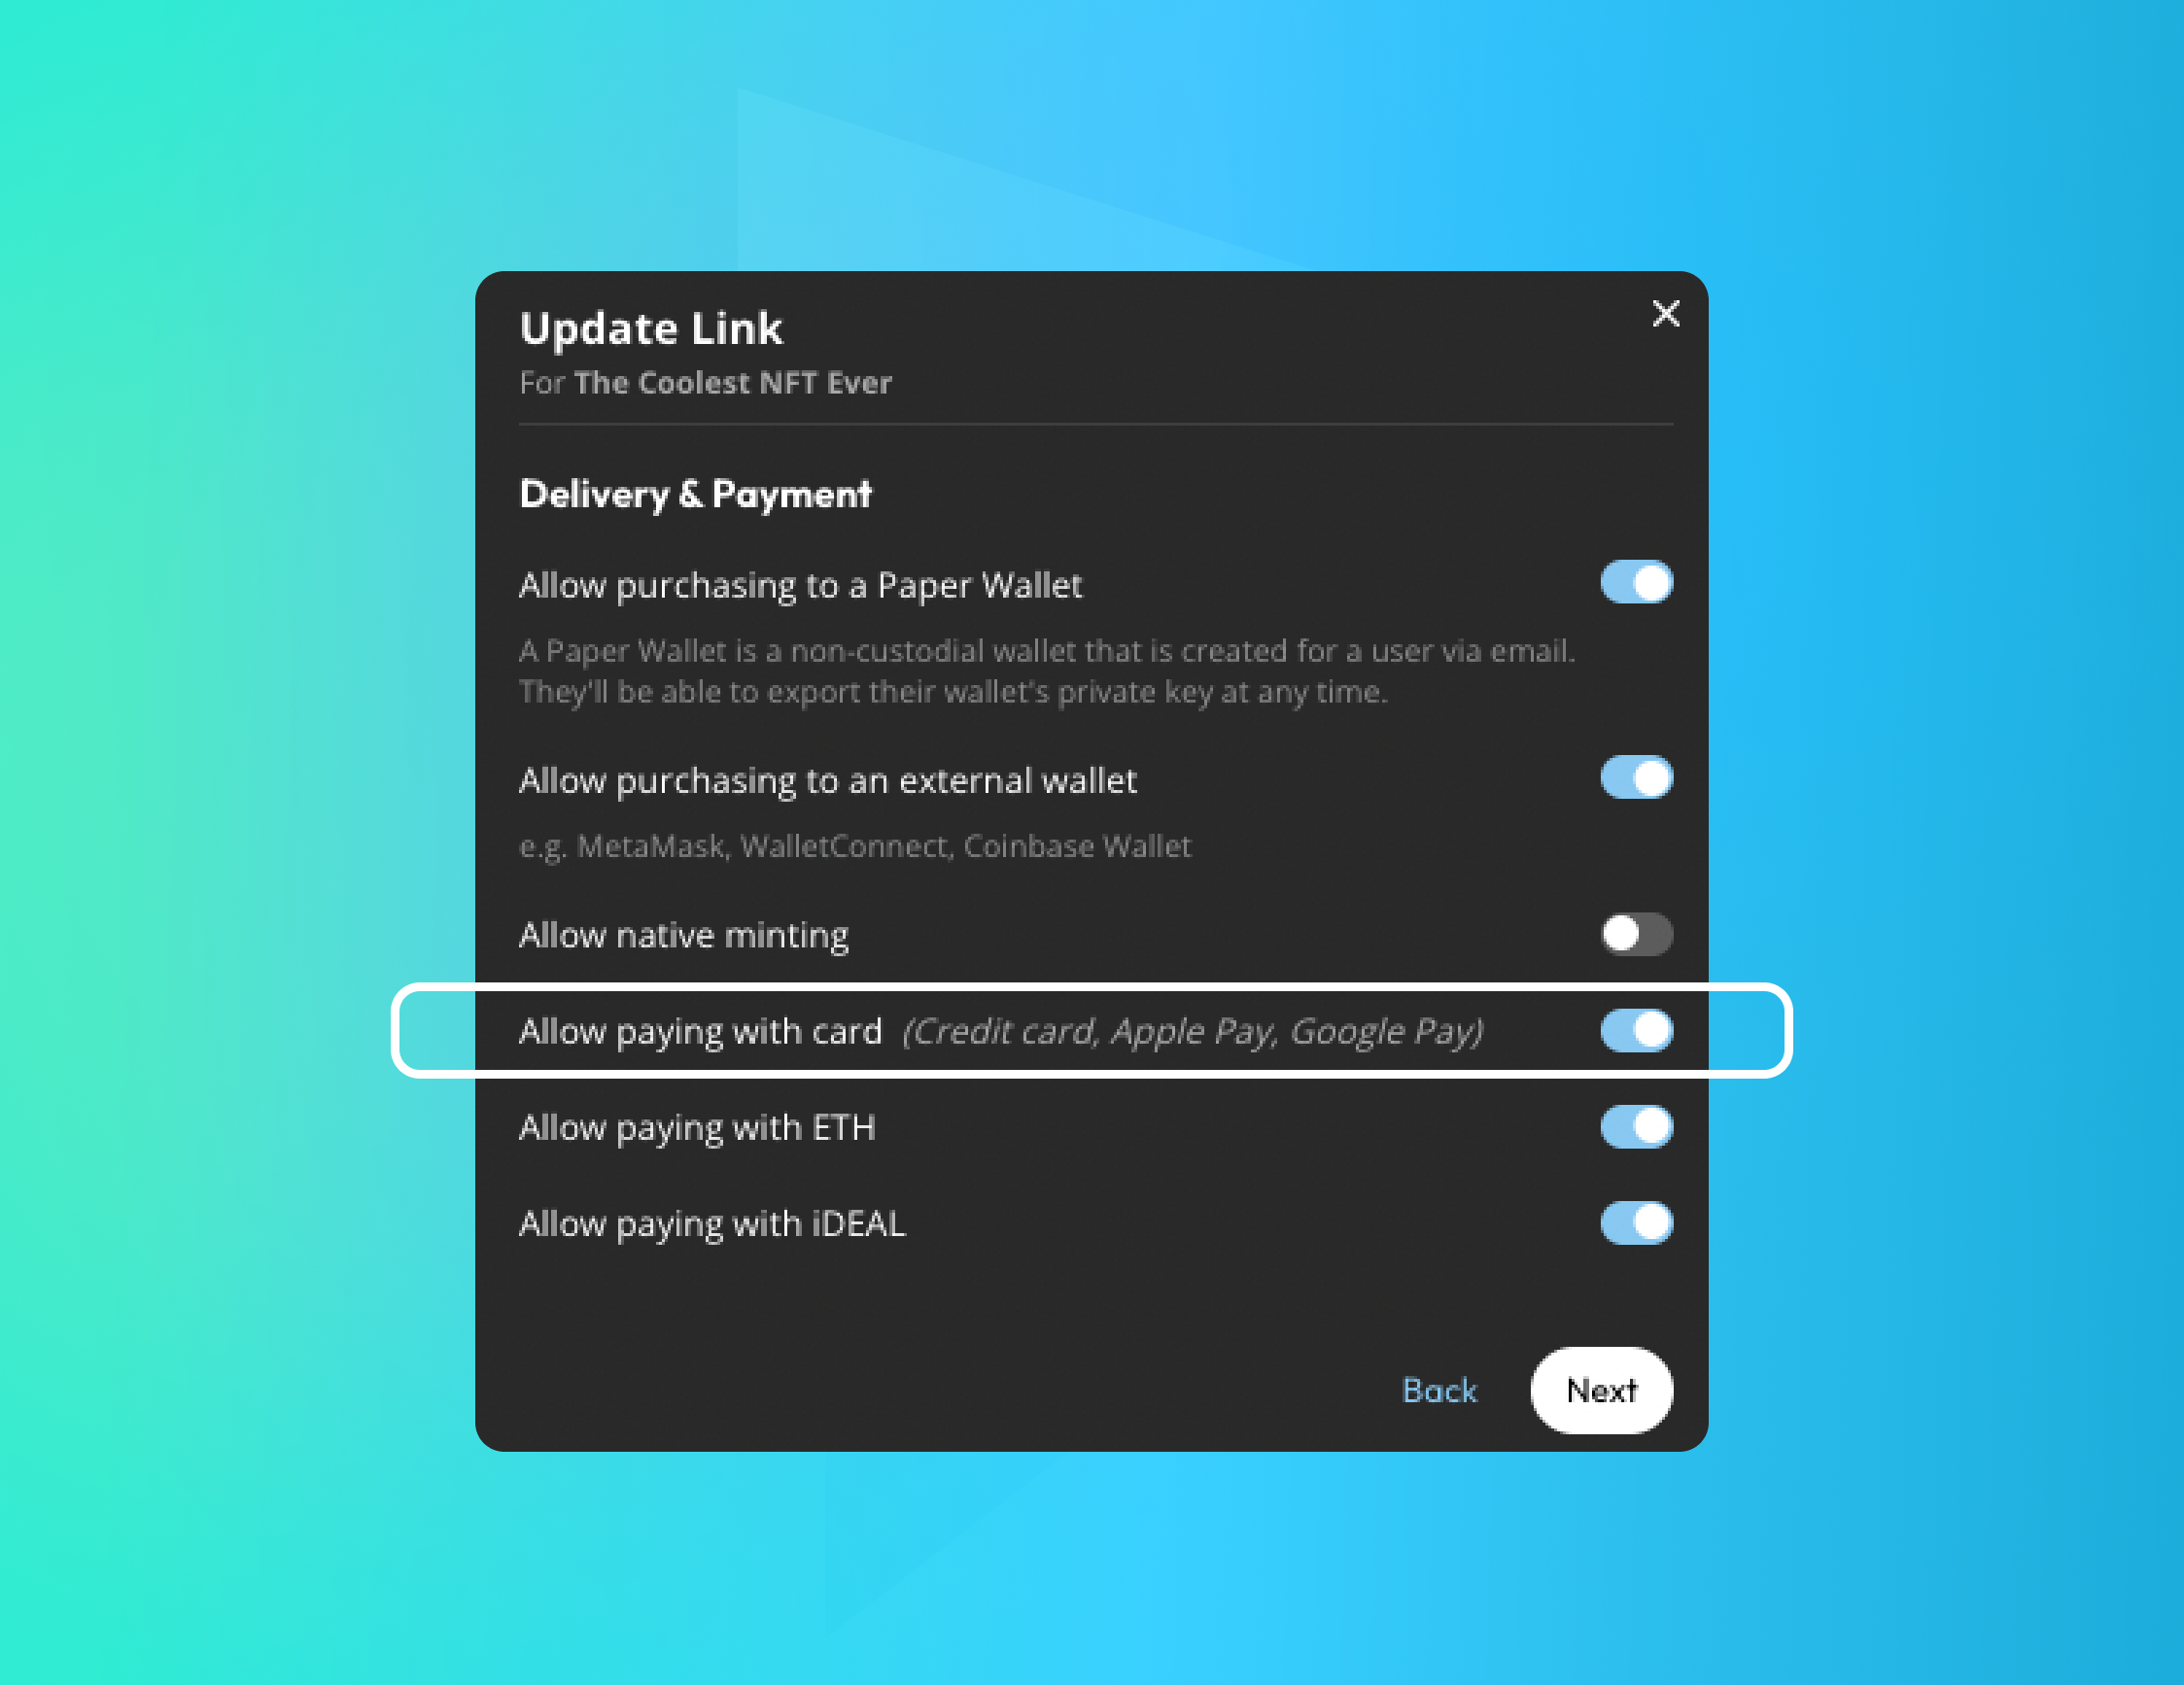
- After entering your collection name and description, navigate to the 'Delivery & Payment' page and ensure 'Allow paying with card' is toggled on
Implementation with Checkout Elements:
- Register your smart contract
- Install our SDK using your favorite package manager
npm install @paperxyz/react-client-sdk
pnpm add @paperxyz/react-client-sdk
yarn add @paperxyz/react-client-sdk
3. Use the <CheckoutWithCard> component by first creating a Checkout SDK intent using our Checkout Elements Client Secret.
Additional FAQ:
What shows up on my customer's credit card transaction
By default, the credit card transaction will be described by the name of the checkout, which Stripe then truncates to 22 characters.
How is credit card data stored?
Paper's payment provider(s) are certified to PCI Service Provider Level 1, the highest standard set by the payment card industry to ensure that credit card data is processed, stored or transmitted in a secure environment (source). This data is never sent through Paper's servers.
2️⃣ Google Pay
Implementing the ability to accept Google Pay is actually a lot easier than you may think. The not-so-hidden secret is that this payment option is already automatically available when you enable the ability to pay with credit card in your Paper checkout.

How to get Google Pay set up:
If you followed the credit card implementation using either Checkout Links or Checkout Elements mentioned earlier in this article, you're all set to start accepting Google Pay to users who have either of those payment methods set up on their browser or mobile device.
Additional FAQ:
What if I don't want Google Pay automatically enabled?
In the event that you do not want your users to pay with Google Pay, this can only be disabled if you decided to implement support for Google Pay using Paper's Checkout Elements. You can choose to disable Google Pay by creating an SDK intent: hideApplePayGooglePay.
3️⃣ Apple Pay
Similar to Google Pay, Apple Pay is already automatically enabled in your checkout when you use Paper's Checkout Links or Checkout Elements.
How to get Apple Pay set up:
As long as your buyers have Apple Pay set up on their browser or device, the option to pay with Apple Pay will automatically appear within your checkout flow if you have enabled Pay with Card in your Checkout Link or Checkout Element.
Additional FAQ:
When will Apple Pay be available using Paper's Checkout Elements?
Apple Pay is now available using Paper's Checkout Elements!
What if I don't want Apple Pay automatically enabled?
Since Apple Pay is only available when toggling ON "Allow Paying with Card", Apple Pay cannot be disabled at this time unless you also disable Pay with Card.
4️⃣ iDEAL Payments
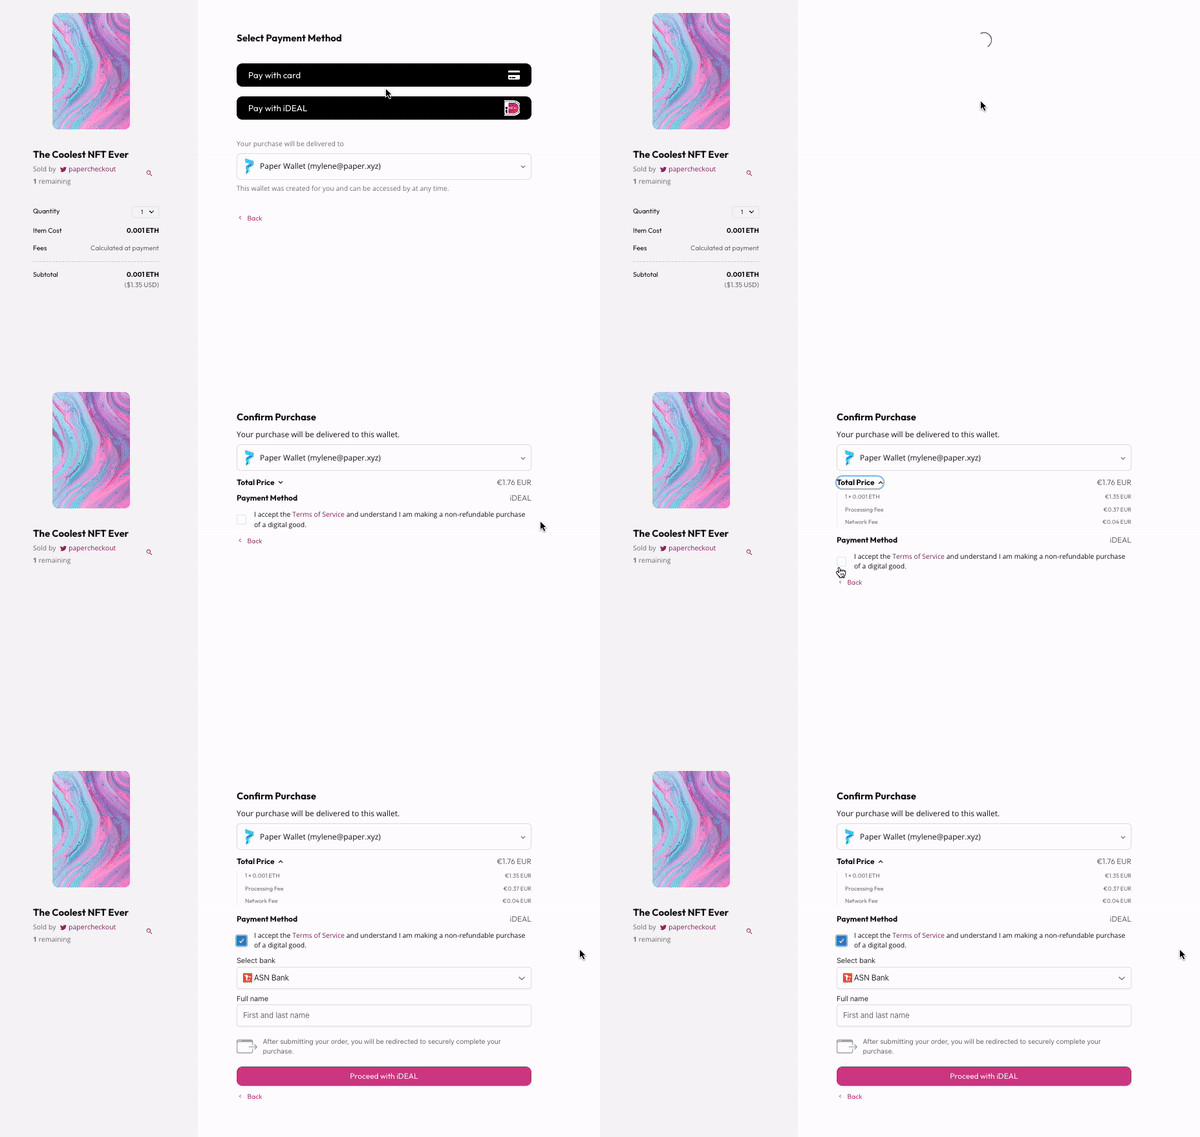
This one is for our friends in the Netherlands. iDEAL is a common payment method in the Netherlands that allows customers to complete transactions online using their bank credentials.
How to get iDEAL payments set up:
Implementation with Checkout Links:
- Register your contract in the 'Contracts' section of your Paper Dashboard
- Create a shareable checkout link by clicking 'Create Shareable Link'
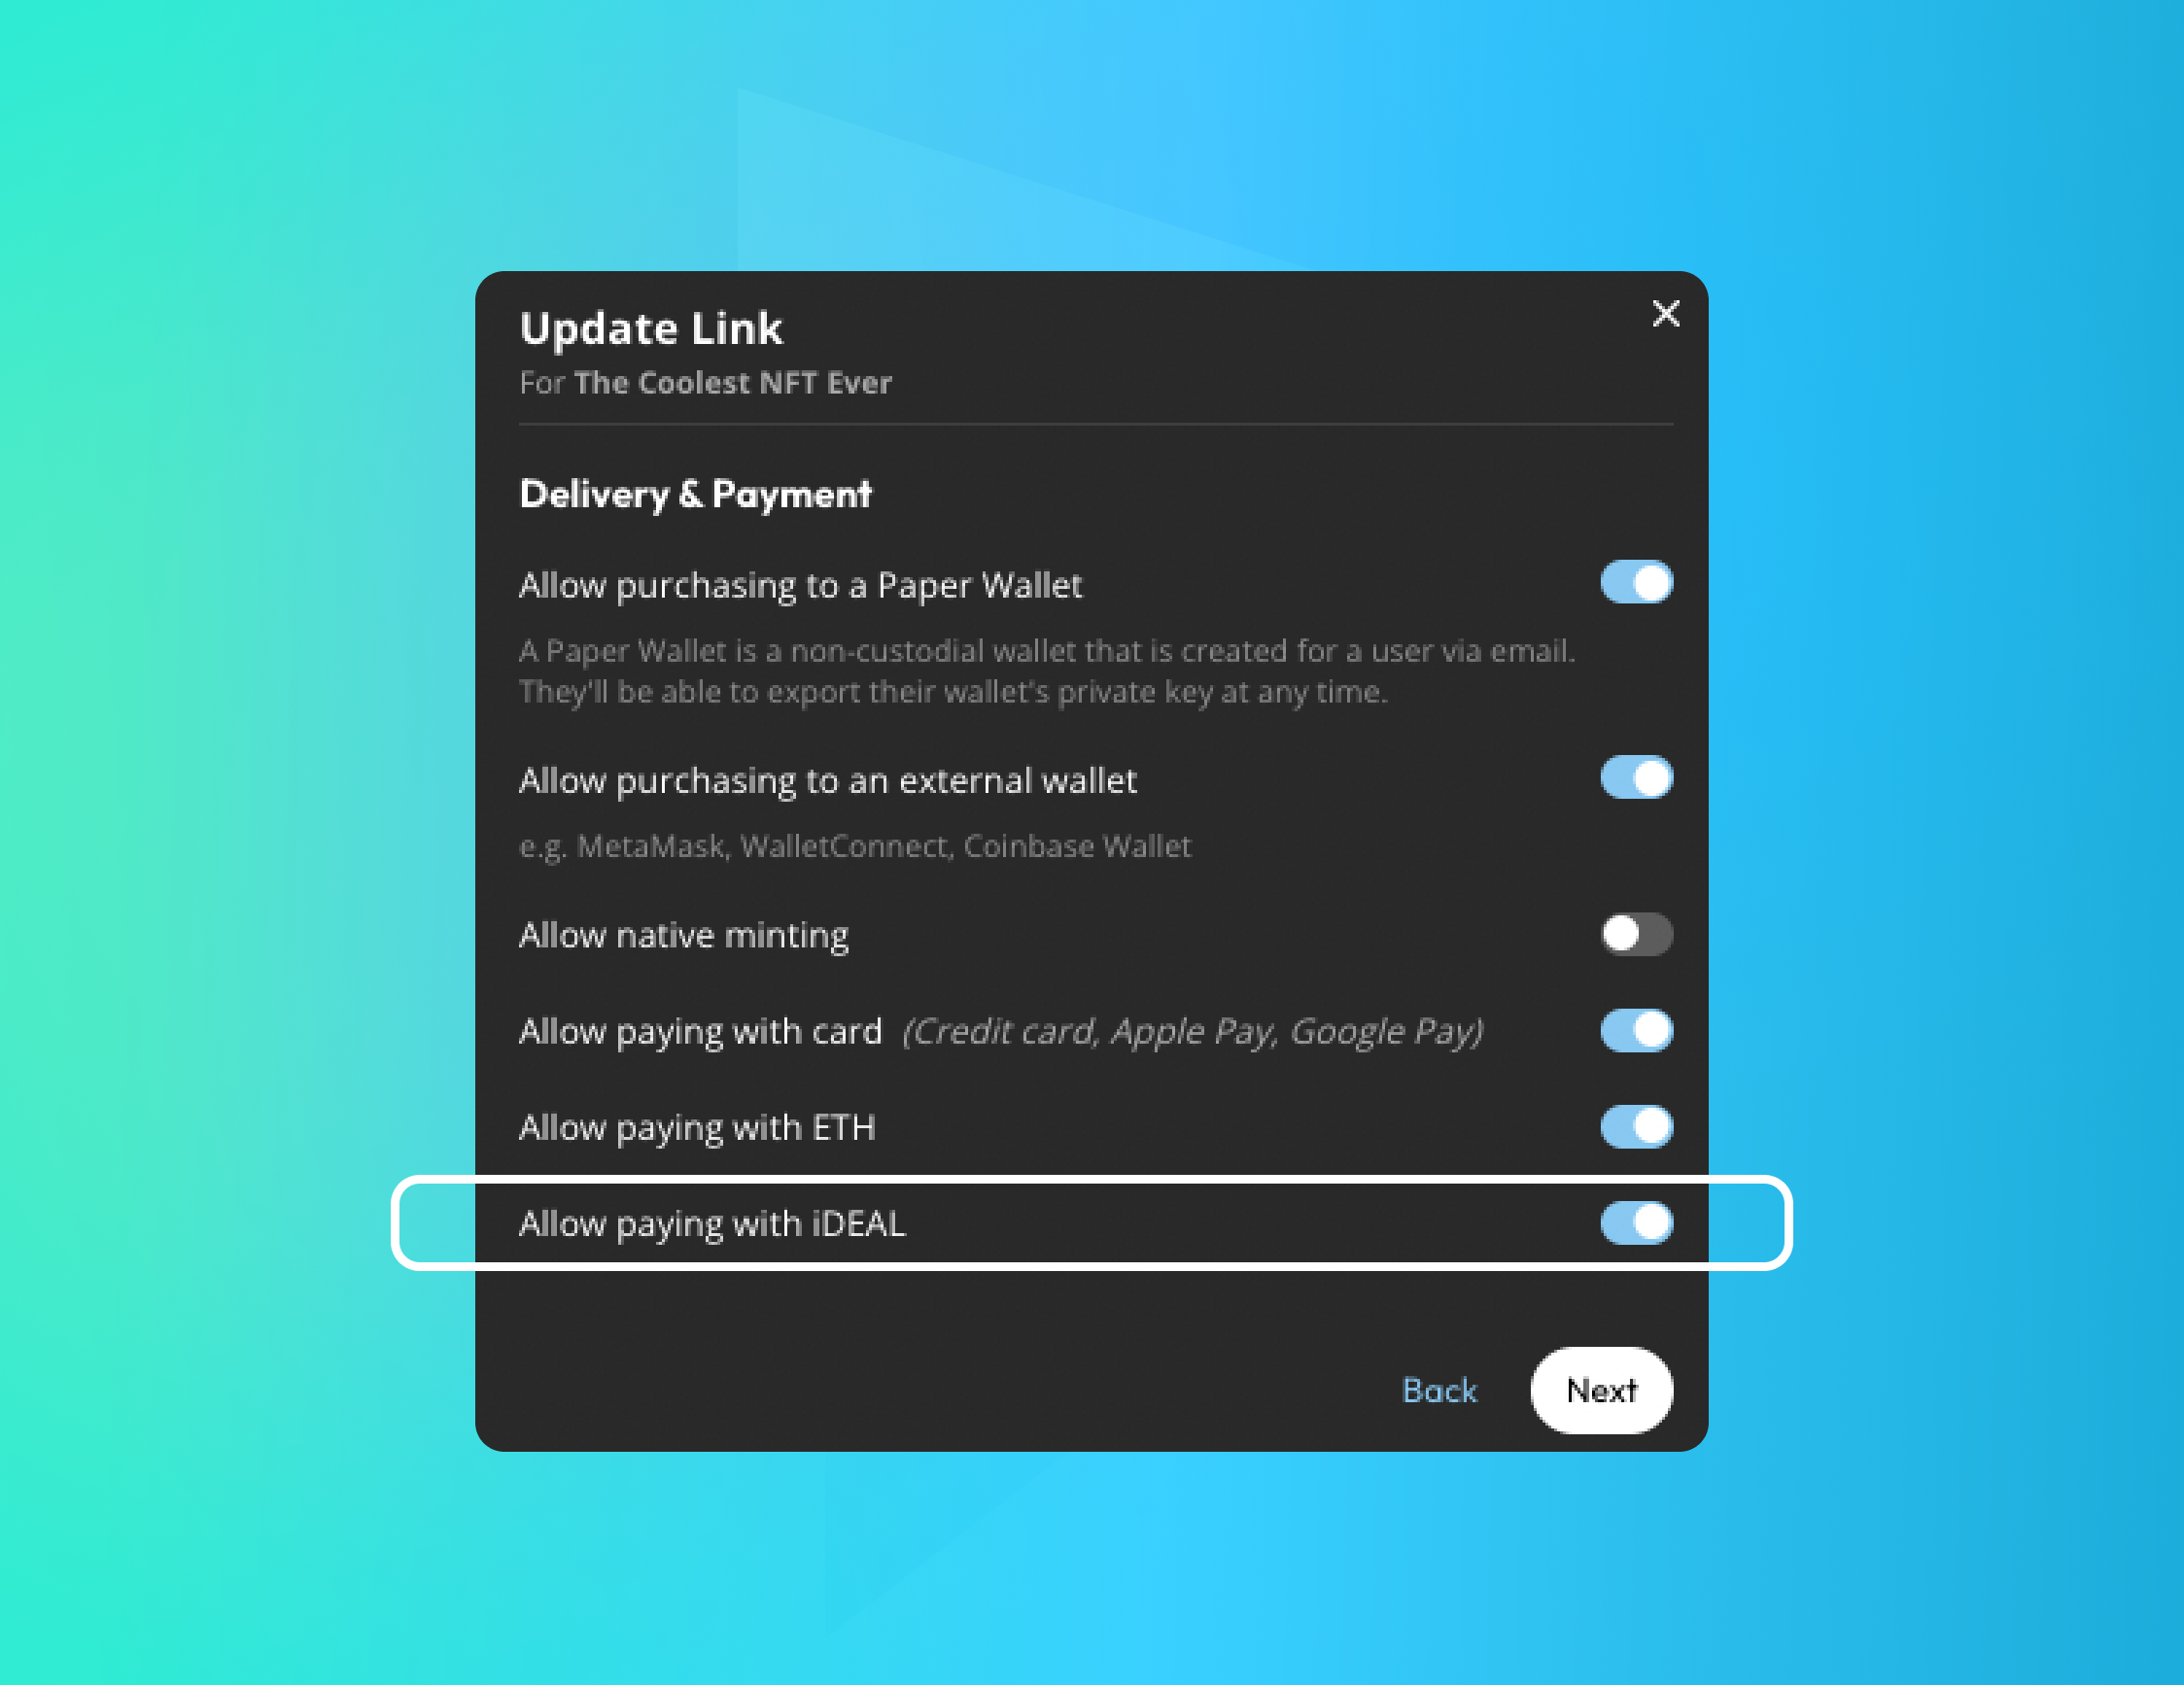
- After entering your collection name and description, navigate to the 'Delivery & Payment' page and ensure 'Allow paying with iDEAL' is toggled on
Setting up iDEAL payments using our Checkout Elements is not yet available.
Additional FAQ:
Are there geographical limitations around who can use iDEAL?
If you are a seller looking to accept iDEAL payments, you can check if you are in an eligible country in Stripe's documentation. If you are a buyer hoping to make a purchase using iDEAL, you can do so if you have a bank account with the parties listed here.
5️⃣ Pay with ETH
Pay with ETH is one of Paper's cross-chain crypto options. Cross-chain crypto payment options allow your buyers to purchase your NFTs in a different type of cryptocurrency from your contract's native token. For example, if you have NFTs priced in MATIC or USDC, this payment option allows your buyers to pay with ETH.
How to get Pay with ETH set up:
Implementation with Checkout Links:
- Register your contract in the 'Contracts' section of your Paper Dashboard
- Create a shareable checkout link by clicking 'Create Shareable Link'
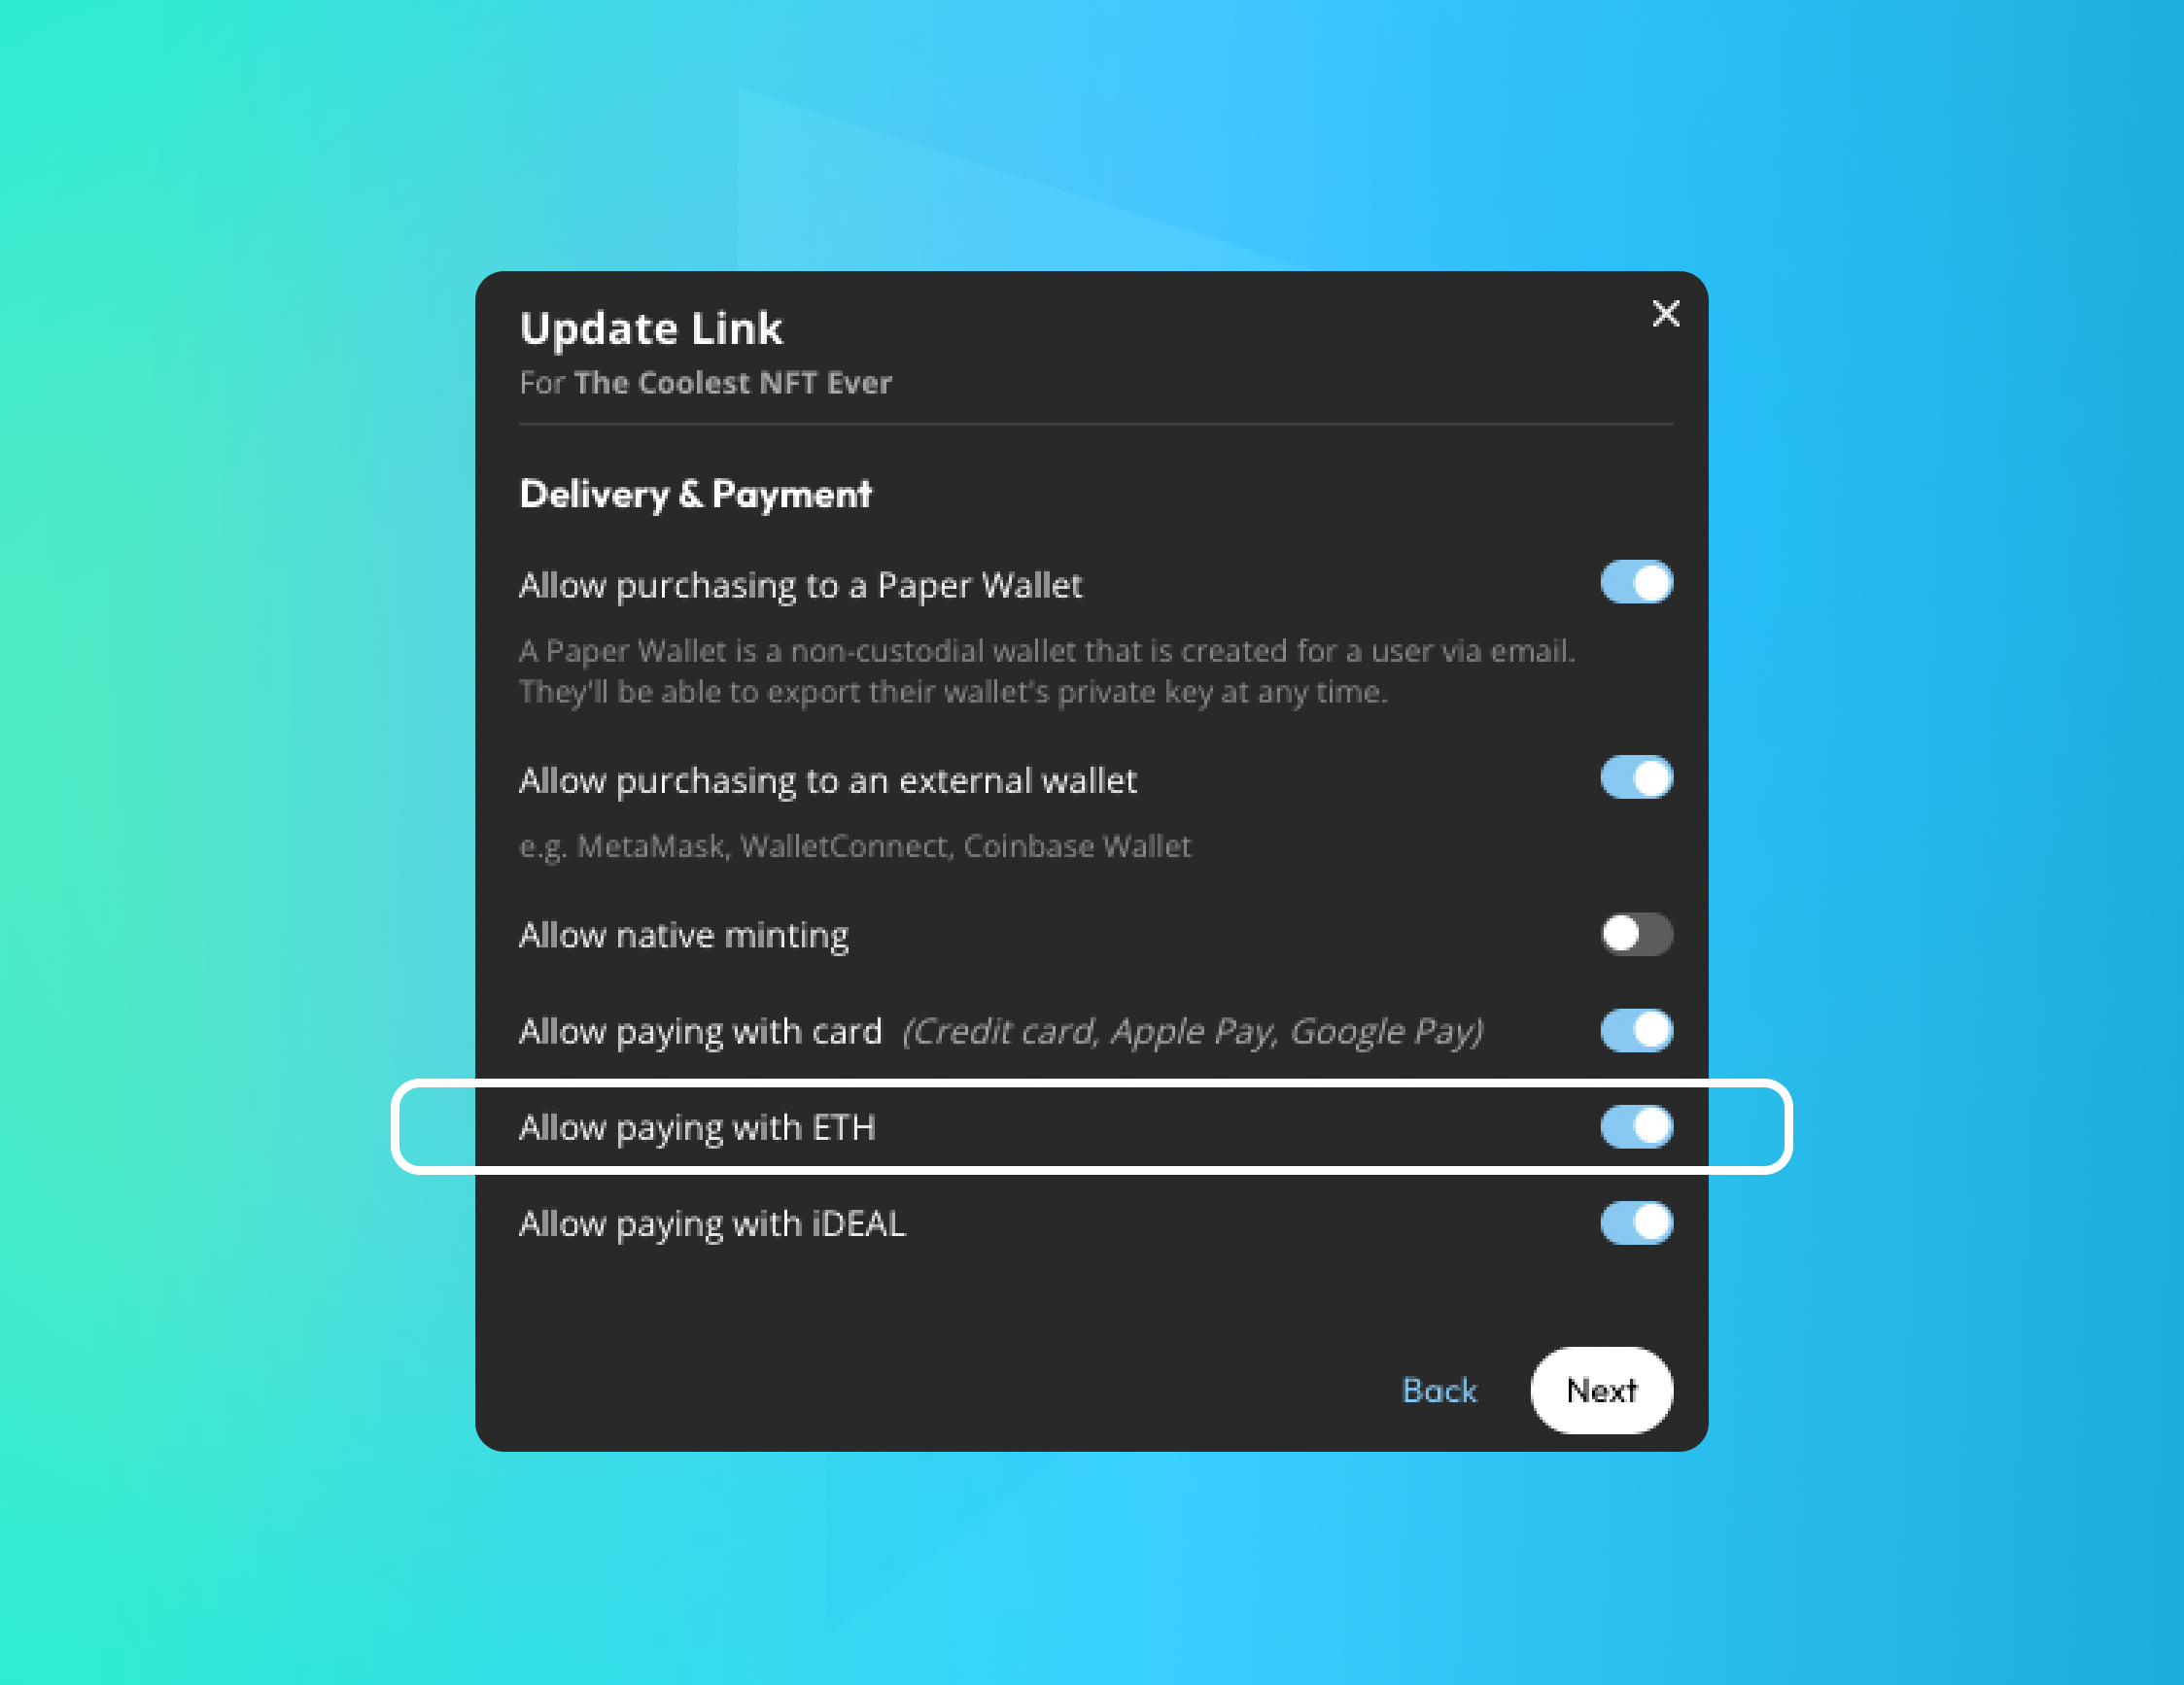
- After entering your collection name and description, navigate to the 'Delivery & Payment' page and ensure 'Allow paying with ETH' is toggled on
Implementation with Checkout Elements:
- Register your smart contract
- Install our SDK using your favorite package manager
npm install @paperxyz/react-client-sdk
pnpm add @paperxyz/react-client-sdk
yarn add @paperxyz/react-client-sdk
3. Use the <CheckoutWithETH> component by first creating a Checkout SDK intent using our Checkout Elements Client Secret.
How does Pay with ETH work?
Pay with ETH allows your buyers to pay Paper's float wallets with existing ETH in their crypto wallet while Paper pays your smart contract in your contract's native currency.
6️⃣ Native Mint
Native minting is when a buyer purchases an NFT using your contract's native currency on the contract's respective blockchain. This type of minting is what your buyers would also experience if they minted directly through your smart contract.
How to get Native Mint set up:
Implementation with Checkout Links:
- Register your contract in the 'Contracts' section of your Paper Dashboard
- Create a shareable checkout link by clicking 'Create Shareable Link'
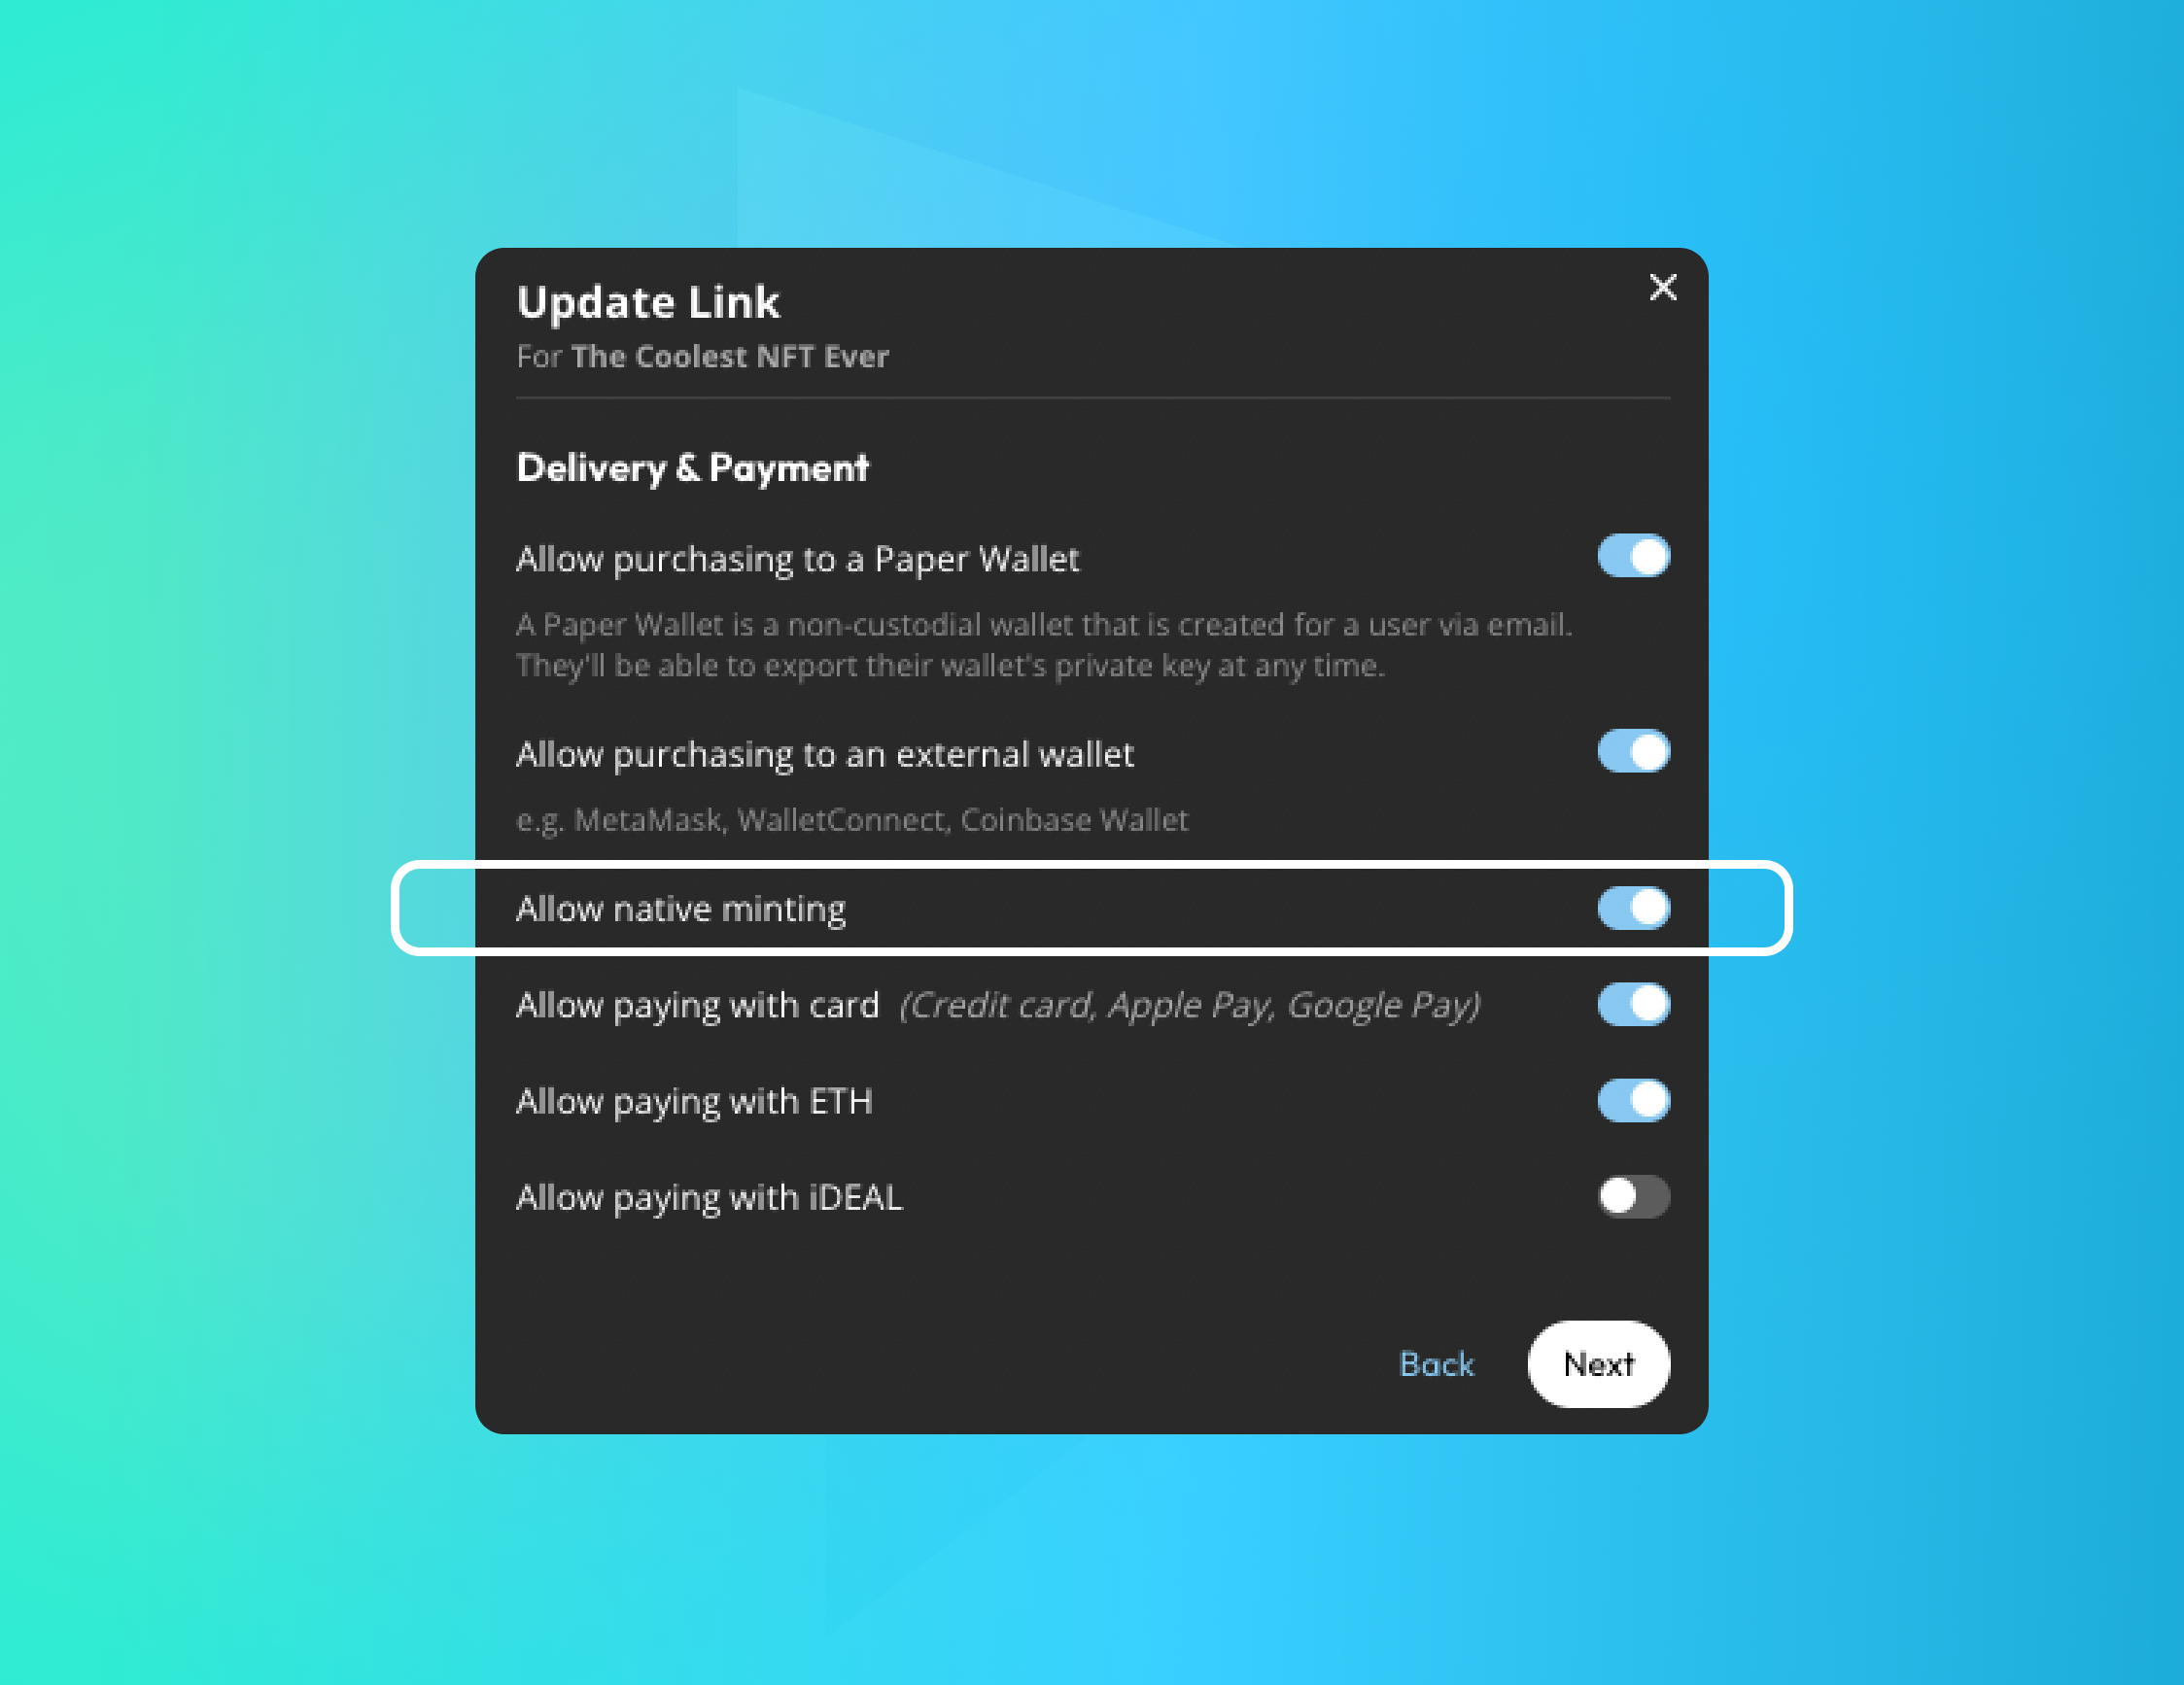
- After entering your collection name and description, navigate to the 'Delivery & Payment' page and ensure 'Allow native minting is toggled on
Conclusion
That's it! Now you know what questions to ask yourself when selecting payment methods and how to implement them. Here's a quick TLDR; to recap what was discussed above:
Stay tuned for part 2 where we'll be discussing all of the elements that make up an effective end-to-end checkout flow!
If you've built with Paper, share your checkout with us in Discord or tag us on Twitter. If you have any additional questions or want to learn more, visit https://withpaper.com/ or follow us on Twitter!
